

TL;DR
- Floor 12 in Genshin Impact V6.3 presents level 95–100 enemies, requiring tight rotations and effective team compositions to succeed.
- The Blessing of the Abyssal Moon boosts damage from Lunar reactions and Charged Attacks, making reaction-centric teams extremely potent.
- Recommended characters include Neuvillette and Nefer for the first half (Charged Attack focus) and Columbina and Ineffa for the second half (Lunar reaction focus).
Disclaimer: This summary was created using Artificial Intelligence (AI)
This Genshin Impact V6.3 Spiral Abyss Floor 12 guide hits different, because this is the point where the game stops pretending to be fair. Floor 12 in Version 6.3 (Luna IV) throws level 95–100 enemies at you, demands tight rotations, and punishes sloppy team building especially in the second halves, where Lunar reaction damage and Charged Attack setups really matter.
This floor is where every Abyss mechanic stacks on top of each other. Shields take longer to break, enemies refuse to stay grouped, and missing a reaction window can cost you an entire star. You’re not just checking DPS here, you’re checking elemental coverage, uptime, and how clean your execution actually is.
This guide breaks down the Blessing of the Abyssal Moon, enemy lineups for every chamber, and the team comps that consistently clear all three floors. If you’re aiming for a clean 36-star clear in V6.3, this is the floor where preparation matters more than raw stats.
Floor Mechanics: Blessing & Ley Line Disorder
Genshin Impact Characters
Our Genshin Impact V6.3 Spiral Abyss Floor 12 guide starts with discussing about the floor mechanics in this version’s Spiral Abyss. Understanding these mechanics will definitely help your success rate.
Blessing of the Abyssal Moon — Surgestrike Moon
When a character triggers a Lunar reaction (Lunar-Bloom, Lunar-Charged, or Lunar-Crystallize) on an opponent, a shockwave is unleashed at the enemy’s position, dealing True DMG. This can trigger once every ~3 seconds.
Ley Line Disorder (Floor 12 Specific):
- First Half: Charged Attack DMG is increased by 75%. Favoring characters that hit hard with charged bursts or aim-based DPS (e.g., Neuvillette, Nefer).
- Second Half: Lunar Reaction DMG is increased by 75% Making reaction-centric teams (Electro + Hydro + Lunar units) extremely potent.
The blessing and disorders here don’t force a strict team, but they do favor high-damage and reaction-focused compositions, especially in the latter chambers.
See Also: Lost the 50/50? This Genshin Impact 50/50 Guide Explains Why

Floor 12 Rewards (Stars & Bounties)
Completing each chamber and earning stars nets:
- Mora and Primogems awarded per star tier.
- Star Bounty: Up to 100 Primogems for all 9 Stars.
- Domain Reliquary Tiers I & II for completion.
Recommended Characters for Spiral Abyss Floor 12 V6.3
Obviously our Genshin Impact V6.3 Spiral Abyss Floor 12 guide has to continue with the characters that do best in this version’s Spiral Abyss. Interestingly, this Spiral Abyss rotation strongly favors Charged Attack DPS in the first half and Lunar / Electro-based reaction damage in the second half. Picking the right carries and enablers matters more than raw constellation levels this cycle.
Below are the standout characters based on buff synergy, enemy mechanics, and community clear data.
Genshin Impact 2026 character roster
Neuvillette

Neuvillette is arguably the best first-half carry in this Abyss rotation. The 75% Charged Attack DMG buff directly amplifies his main damage source, letting him delete high-HP enemies like the Perpetual Mechanical Array with minimal setup.
He excels at:
- Sustained Charged Attack DPS
- Large AoE coverage
- Minimal reliance on reactions
If you’re struggling to beat Chamber 1’s time check, Neuvillette solves that problem almost immediately.
Nefer
Nefer performs extremely well in Floor 12 thanks to her Charged Attack-centric playstyle and strong damage scaling. She benefits heavily from the first-half Ley Line Disorder and remains effective even against tanky or multi-phase enemies.
She’s especially strong when:
- Paired with Hydro or Anemo supports
- Played in comps that maintain uninterrupted Charged Attack uptime
Nefer is one of the most consistent clears reported by players aiming for fast 3-star Chamber 1 runs.
Lyney

Lyney thrives in Floor 12’s first half if you’re comfortable playing around Charged Shots and positioning. The Charged Attack buff significantly boosts his output, allowing him to chunk bosses before they enter defensive or split phases.
Best used when:
- You can keep enemies grouped or controlled
- You have strong off-field supports to maintain pressure
Lyney rewards precision but pays it back with very fast clear times.
Hu Tao

Hu Tao remains a strong option for players who prefer single-target burst DPS. While she doesn’t benefit from Lunar reactions, the Charged Attack bonus still amplifies her core damage loop.
She’s effective against:
- Boss-type enemies
- Enemies with short vulnerability windows
Just be mindful of survivability in later chambers where enemy damage ramps up significantly.
Columbina

Columbina shines in the second half of Floor 12, where the Lunar Reaction DMG bonus is active. Her kit naturally triggers Lunar reactions, allowing her to repeatedly proc Abyssal Blessing shockwaves for true damage.
She’s particularly strong against:
- Shielded or resistance-heavy enemies
- Long-duration fights where reaction uptime matters
Columbina is one of the most commonly recommended second-half carries in community clears for V6.3.
Ineffa
Ineffa is another top-tier second-half pick thanks to her consistent elemental application and Lunar reaction synergy. She helps break shields efficiently while contributing meaningful sustained damage.
She works best when:
- Paired with Hydro or Electro teammates
- Played in reaction-focused rotations
If your second-half clears feel slow, Ineffa often fixes that instantly.
Flins
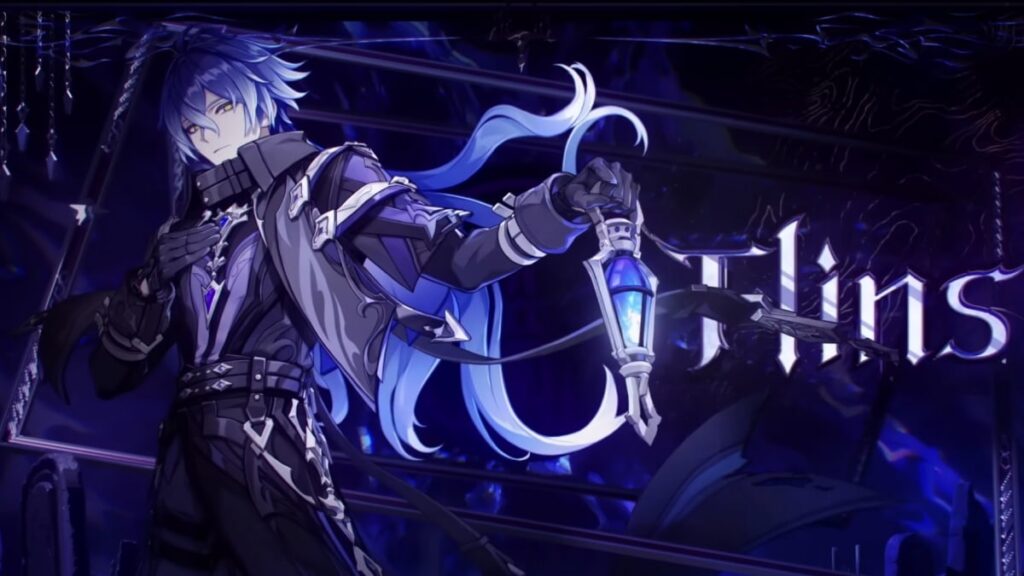
Flins is an excellent enabler and DPS hybrid for Lunar reaction teams. His ability to maintain reaction chains makes him especially valuable in Chambers 2 and 3, where shield mechanics and resistance phases are common.
He excels at:
- Sustained reaction damage
- Amplifying Abyss Blessing procs
Flins is a strong pick for players who want reliable clears without strict burst timing.
Raiden Shogun
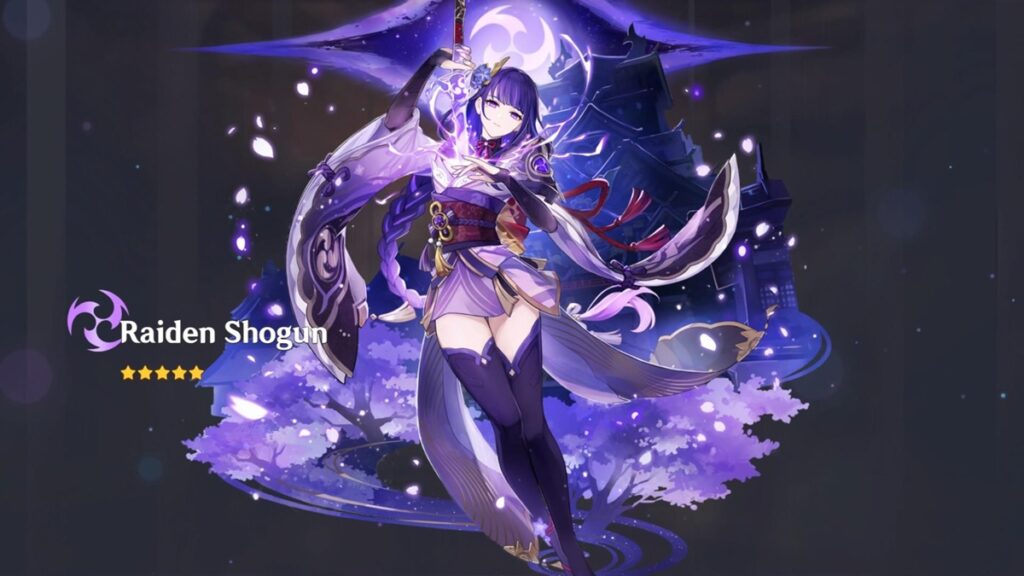
Raiden Shogun remains a flexible powerhouse for Floor 12’s second half. Her Electro application pairs well with Hydro and Lunar units, and her burst helps stabilize energy across the team.
She’s useful for:
- Electro-Charged and Lunar-Charged setups
- Energy-hungry team comps
Raiden also smooths out rotations in Chambers with frequent shield breaks.
Kazuha

Kazuha isn’t a DPS carry here, but he’s one of the most valuable supports in the entire rotation. Grouping enemies, amplifying elemental damage, and spreading reactions make him almost universally useful.
He’s especially impactful in:
- Chamber 1 multi-target phases
- Reaction-heavy second-half teams
If you’re missing stars by seconds, Kazuha is often the difference-maker.
See Also: Genshin New and Upcoming Characters You Might Want to Save For
Genshin Impact Spiral Abyss Floor 12 Chamber 1 Strategy & Teams
Enemy Lineup
- First Half: Perpetual Mechanical Array ×1 (splits into Ruin Sentinels after entering Absolute Defense).
- Second Half:
- Wilderness Exile ×2 (enter Grief-Stricken instead of dying normally).
- Battle-Hardened Lightkeeper ×1 (also enters Grief-Stricken).
Strategy Tips
- Burn quick and group enemies: The first half is mostly a damage check. Grouping aids in damage throughput.
- Grief-Stricken mechanic: Some enemies don’t die immediately, they enter a second state that you must finish. Strong, consistent damage is crucial.
- Charged attack builds: Units like Neuvillette or Nefer can capitalize on the 75% Charged Attack buff in the first half.
Floor 12 Chamber 1 Recommended Team Lineups
First Half (Charged Attack Focus)
- Neuvillette – Main DPS
- Kazuha – Grouping + Elemental DMG buff
- Furina / Xingqiu – Hydro application and amplification
- Baizhu / Zhongli – Sustain and interruption resistance
Second Half (Reaction-Oriented DPS)
- Columbina – Reaction DPS core
- Raiden Shogun – Electro application and Energy generation
- Kazuha – Reaction amplification
- Bennett / Baizhu – Healing and ATK buffs
These teams consistently trigger the Chamber 1 mechanic while avoiding downtime penalties.
Genshin Impact Spiral Abyss Floor 12 Chamber 2 Strategy & Teams
Enemy Lineup
- First Half: Construction Specialist Mek – Ousia ×1, plus Burning-Aflame Wayob Manifestations (shielded trial mechanics).
- Second Half: Battle-Hardened Pipilpan Idol ×1 (uses hat switching shield that’s very weak to Reactive damage).
Strategy Tips
- Shield-Breaking Priority: Break shields with quick elemental bursts. Electro-Charged/Lunar-Charged especially helps destabilize the Pipilpan Idol.
- Trial Arena Buff: In some fights, characters temporarily lose energy but gain boosted damage. Manage your rotation to fit this time window.
- Elemental Priority: Hydro + Electro and Lunar reactions quickly dismantle shields and accelerate clear times.
Floor 12 Chamber 2 Recommended Team Lineups
First Half (Shield Pressure + Consistency)
- Lyney / Hu Tao – Primary DPS
- Xiangling – Off-field Pyro damage
- Kazuha – Resistance shred and grouping
Zhongli – Shielding and universal RES shred
Second Half (Shield Break & Reaction Spam)
- Ineffa – Reaction enabler
- Raiden Shogun – Electro core and Energy support
- Furina / Xingqiu – Hydro application
- Baizhu / Bennett – Sustain
Fast elemental application is more important here than raw crit numbers.
Genshin Impact Spiral Abyss Floor Floor 12 Chamber 3 Strategy & Teams
Enemy Lineup
- First Half: Radiant Antelope ×1 & Radiant Glacial Wolf ×1
- These enemies reduce incoming heals, damage, Crit Rate, and deal debuff effects — making it high-risk without quick burst.
- Second Half: Knuckle Duckle ×1 (periodically increases resistances and summons ducks that reduce its HP when defeated).
Strategy Tips
- Burst Before Debuffs: Against Radiant Beasts, trigger Ultimates early before debuffs escalate.
- Knuckle Duckle Mechanics: Defeating summoned ducks weakens the boss — focus duck DPS while maintaining pressure.
- Lunar & Electro Focus: Second half benefits hugely from reaction damage due to the 75% Lunar Reaction buff.
Floor 12 Chamber 3 Recommended Team Lineups
First Half (Burst Control & Survivability)
- Nefer / Hu Tao – Burst DPS
- Yelan / Xingqiu – Damage amplification
- Kazuha – Crowd control and shred
- Zhongli / Baizhu – Defensive stability
Second Half (Summon Control & Reaction Damage)
- Flins – Reaction-focused DPS
- Raiden Shogun – Electro application and Energy
- Columbina / Furina – Reaction scaling
- Bennett – ATK buff and healing
Clearing summons quickly massively shortens the boss’s effective HP.
Genshin Impact V6.3 Spiral Abyss Floor 12 Guide: Tips for Success
1. Reaction Priority over raw DPS:
In the second halves of chambers, prioritizing Lunar reactions (or Electro-Charged) often accelerates clears instead of brute force.
2. Energy Management:
Shielded Mek and Pipilpan fights require careful Ult energy timing. Manage bursts so you don’t enter buffed damage phases empty.
3. Grouping Is Key:
Many fights, especially in Chamber 1, reward enemy clustering so your AoE and reaction storms hit multiple targets.
See Also: Columbina Personality: Genshin Impact’s Quietest, Creepiest Harbinger
Genshin Impact V6.3 Spiral Abyss Floor 12 is a mix of reaction checks, burst timing, and efficient shield breaking. Balancing Charged Attack damage in early halves with powerful Lunar reaction setups in the latter halves gives you the best shot at full stars. While difficult, understanding enemy mechanics like Grief-Stricken states and shield immunities and playing to your team’s strengths will make even the toughest rooms manageable.
Want more Primogems for your teams and resins for runs? Top up Genshin Impact on Joytify for fast, reliable crystal delivery before your next Abyss reset.
TL;DR
- Floor 12 in Genshin Impact V6.3 presents level 95–100 enemies, requiring tight rotations and effective team compositions to succeed.
- The Blessing of the Abyssal Moon boosts damage from Lunar reactions and Charged Attacks, making reaction-centric teams extremely potent.
- Recommended characters include Neuvillette and Nefer for the first half (Charged Attack focus) and Columbina and Ineffa for the second half (Lunar reaction focus).