

TL;DR
- Conduit Crystal is a rare resource essential for crafting key items like the Bioscanner and Advanced Battery, found in the Power Plant Biome at depths of 300-400 meters.
- Players need to be well-prepared for the expedition, including using the Tadpole submarine with Depth Module Mk. 1, bringing high-capacity oxygen tanks, and setting up a temporary outpost with a Scanner Room.
- Conduit Crystals spawn near points struck by blue lightning from alien devices, which creates a farming mechanic that requires patience and careful observation of the environment.
Disclaimer: This summary was created using Artificial Intelligence (AI)
Conduit Crystal in Subnautica 2 is the resource that stops mid-game progress cold. You’ll be staring at the Bioscanner recipe, the Advanced Battery recipe, or the Feedback Resonator blueprint, and every single one of them needs this crystal you’ve never seen before.
It doesn’t spawn near your Lifepod or show up while you’re casually farming titanium. You have to go looking for it at depth, in hostile alien ruins, with the right gear, or you’re going home empty-handed.
Then we cover the exact biome, the precise depth band, everything you need to bring, the lightning-spawn mechanic that most players miss, and every crafting recipe that locks behind this resource.
See also: Active Party Animals Codes in May 2026, Claim Skins!
Subnautica 2 Release Date
Subnautica was officially released on 14 May, 2026. This game is available across platform on Steam, Epic, and Xbox.
See also: Yoshi and the Mysterious Book: First Impression of the New Switch 2 Game
What Conduit Crystal Actually Is
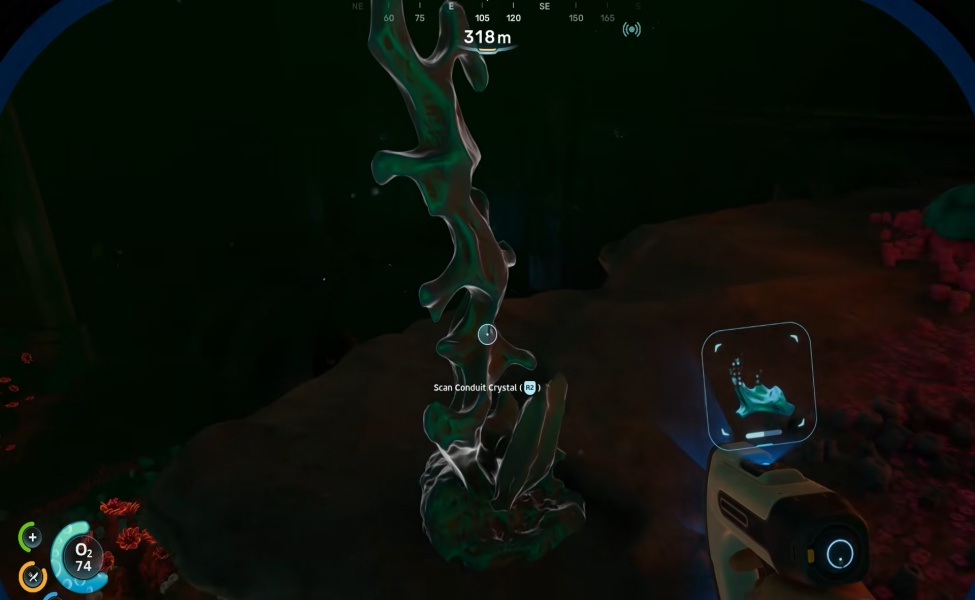
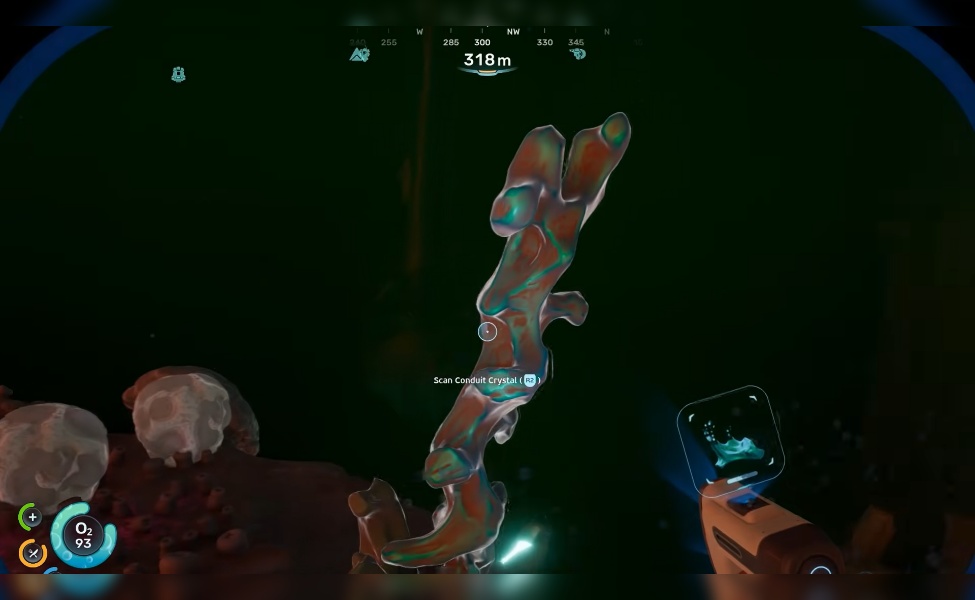
The in-game databank entry describes it as: “Kagome optical fibers derived from shock quartz. Naturally occurring wires for light.”
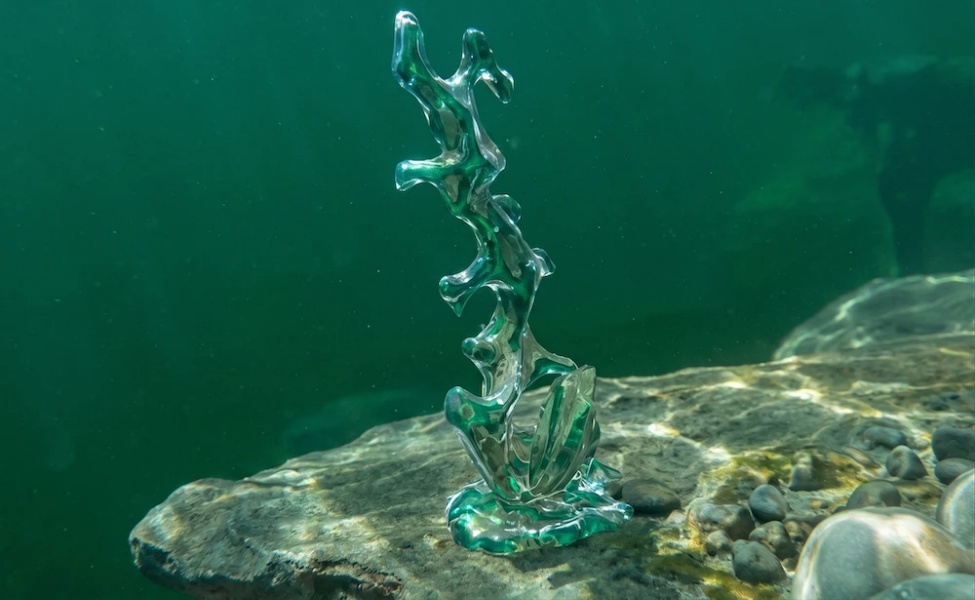
That description tracks with what you see in the water: tall, spindly, branching crystalline nodes with a faint green glow, shaped like shock quartz grew coral-style and then got struck by electricity.

They’re categorized under Resources/Raw Materials and are one of the rarest resources in the current early-access build. Unlike titanium deposits or table coral you can strip by the armful, Conduit Crystal nodes yield one unit.
Occasionally you’ll crack one open and get up to three, but that’s the exception. Most nodes give you one, and you need multiple crystals per recipe, which means every node counts.
Primary Biome & Depth at a Glance
- Biome: Power Plant Biome (also called the Karakorum Region / Angel Comb area; past the Alien Ruins).
- Depth: 300–400 meters.
- Distance from Lifepod: 1,600–2,000 meters East (heading ~130°.
- Primary landmark: Gigantic alien arch structure / Angel Comb / collapsed tesla coils.
If you’re not at roughly 350m depth somewhere between 1,600m and 2,000m east, you’re not in the right area yet.
Appearance
Conduit Crystals look like tall, jagged, green-glowing coral formations with a branching, spindly structure. The issue is they blend into the environment.
They sit against cliff walls, hide behind rock pillars, grow on seafloor ledges near alien structure bases, and tuck into gaps that the murky deep-water visibility makes it easy to swim right past.
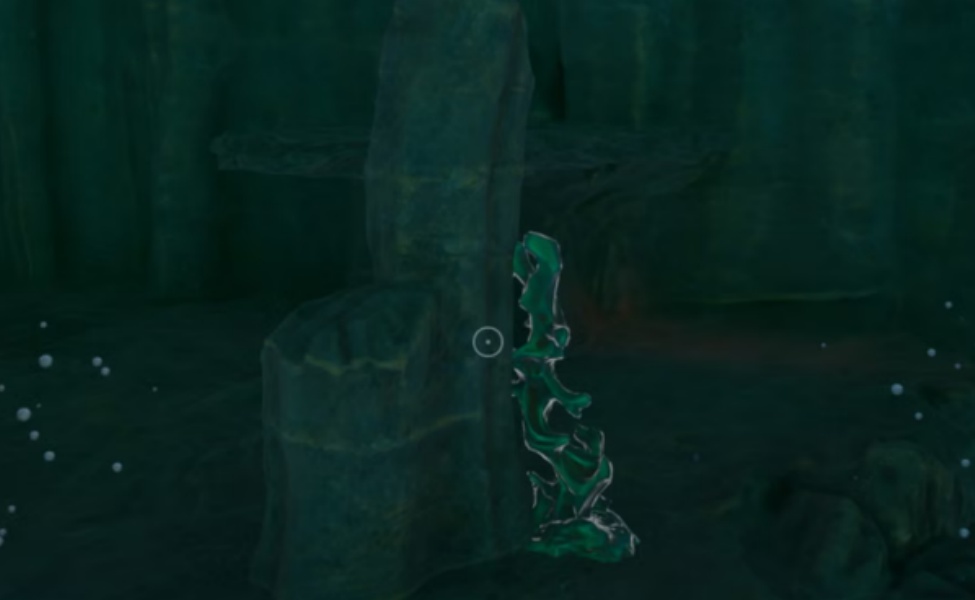
Players consistently describe them as “sneaky”; you can pass within five meters of one without registering it as a resource unless you know what the glow pattern looks like.
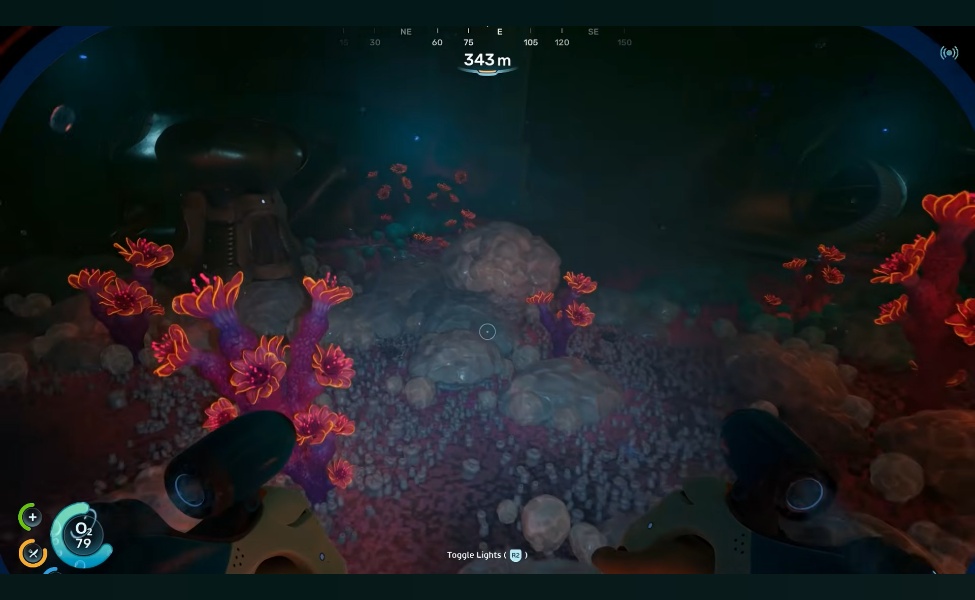
The nearby bioluminescent flora (teal and pink flower-like structures common in that biome) makes things worse because your eye reads the area as generally glowy and stops registering individual nodes as significant.
The fix is the Scanner Room. More on that below.
See Also: GTA 6 Pre-Orders: What You Actually Get for $70
Prerequisites: What to Bring Before You Leave Base
This is a mid-depth extraction run. Going in underprepared wastes the trip.
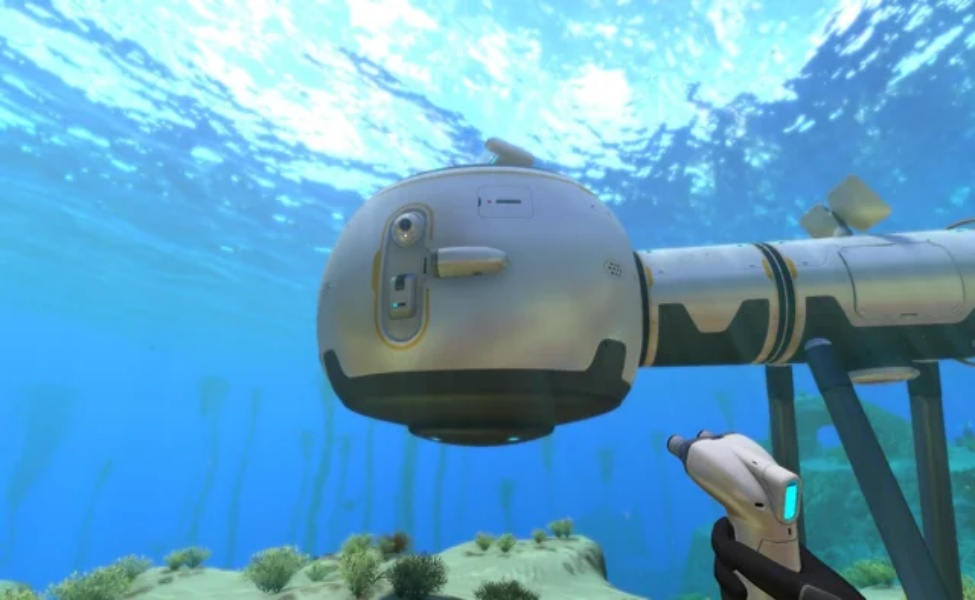
Vehicle: The Tadpole submarine with at least Depth Module Mk. 1 installed. Without it, you’re fighting crush depth warnings before you reach the crystal zone.
The crystals sit at 300–400m, and the Tadpole’s stock depth ceiling won’t cut it. The Mk. 1 module gets you there safely and gives you room to maneuver around the alien structures without the constant hull integrity alarm drilling into your skull.
Harvesting tool: The Sonic Resonator is required. The Survival Multitool does nothing to crystal nodes; they’re too large.
Aim the Sonic Resonator at the node and hold the button to shatter it, then pick up the pieces. There is no Sonic Resonator and no crystals. A complete stop.
Oxygen: Bring high-capacity tanks. You’ll exit the vehicle to harvest nodes, and the crystals are often positioned on cliff walls or ledges that require some swimming distance from wherever you parked.
The “Oxygen…” warning voice has a way of going off right as you spot a node thirty meters away on a cliff face. Extra O2 tanks prevent the moment where you have to choose between the crystal and making it back.
Scanner Room components: If you plan to establish a temporary outpost near the Angel Comb area, which is the most efficient way to farm multiple crystals, bring enough materials to build a small base with a Scanner Room.
The Scanner Room set to track Conduit Crystal cuts search time significantly. It highlights nodes you’d otherwise swim past entirely.
Power cells: The 1,700-meter one-way trip drains power cells faster than a standard short run. Bring spares. Running out of power east of the Alien Ruins with a Leviathan in the area is its own kind of stress test.
Medkits and food/water: Stock up before departing. This isn’t a quick errand.
See Also: 2026 Video Game Release Dates: PS5, PS4, Xbox, PC and Switch
Where to Find Conduit Crystal in Subnautica 2
1. The Power Plant Biome (Angel Comb Region)
All confirmed crystal spawns are in the Power Plant Biome, past the Alien Ruins that mark the transition from the starting area into the game’s second major zone.
The biome is visually distinct: factory-like alien architecture, collapsed towers, a massive tent-like arch structure covering an oceanic canyon, and the Angel Comb itself (a large ring/turbine-like alien feature that becomes important for farming).
The biome does not have one tight cluster of crystals. Spawns are spread across a large region, which is why most players make multiple trips before they stockpile enough for a recipe.
2. Navigation Route from the Lifepod
Travel east from your Lifepod on approximately a 130° heading. Keep your Tadpole near the surface initially; the deeper channels heading east have more aggressive fauna patrols, and there’s no reason to deal with them before you need to descend.
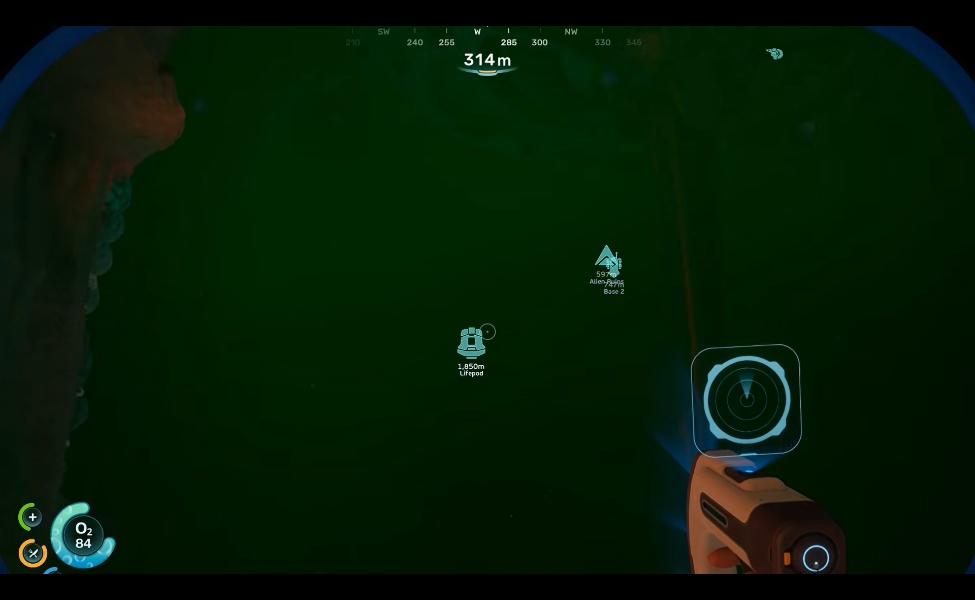
At around 1,300–1,500m east, you’ll start seeing alien structures appear to your left. That’s the outer edge of the Alien Ruins.
Follow the channel downward on the right side, hugging the wall and descending as you go. Around 250–300m depth you’ll see the massive arch structure, or the “gigantic turbine”, which is your primary landmark for the best crystal spot.
3. Primary Spawn Points
Giant Arch Base (Best Spot): At the base of the large alien arch structure, roughly 350m depth and 1,500m east, you’ll find collapsed tesla coils and alien towers emitting blue lightning. This is where the primary spawning mechanic happens. Crystals grow on the cliff walls, on the seafloor near the structure’s base, and along the ledges of the arch itself.
Angel Comb Cliff Walls: The ledges and upper walls surrounding the Angel Comb have consistent crystal spawns. They grow singly on the cliff faces, which makes them easy to miss on a fast pass. Slow down and actually look at the wall surfaces.
Alien Control Center (1,700m East): Farther east, around 1,700m, the large alien control center has crystals scattered around its perimeter. If you’ve harvested everything at the arch and Angel Comb and still need more, the control center area is worth sweeping.
Secondary Sparse Spawns: Northeast of the Tadpole Pens and southwest of the Yellow Chemical Waste area have occasional spawns. These are not reliable enough to plan around but more like bonus finds if you’re already in the area.
See also: Paralives Release Date: When You Can Play and Other Details
The Lightning-Spawn Mechanic (How Farming Actually Works)
This is the mechanic that most guides skip, and it’s the difference between three frustrating return trips and stockpiling five or six crystals in a single extended run.
Conduit Crystals spawn at points struck by blue lightning from the alien electric devices in the Power Plant Biome, specifically the collapsed tesla coils and fallen alien towers near the Angel Comb.
The lightning fires irregularly, strikes the seafloor or cliff faces nearby, and generates fresh crystal nodes at the impact point. The farming cycle:
- Arrive at the Power Plant Biome / Angel Comb area in the Tadpole.
- Harvest any crystal nodes you can find on your initial sweep.
- Stay in the area and watch the fallen towers and collapsed coils. When a tower fires a lightning strike, move to that spot immediately.
- A new crystal node will have spawned at or near the strike point. Harvest it.
- Some fallen towers are especially reliable and will fire again shortly after you harvest the resulting crystal. Park near those towers and run the loop until you have what you need.
One-time bonus: Activating the Angel Comb (there’s a puzzle/activation sequence tied to it) reportedly spawns four or five additional crystals around the structure as a single event. If you haven’t activated it yet, doing so during your crystal run is free inventory.
The crystals don’t respawn on a fixed timer because they’re tied to the lightning events. Patience is the actual farming requirement here.
Some runs feel slow because the towers fire infrequently. Other runs the lightning hits three times in a row and you’re suddenly fine on materials.
See Also: Arc Raiders Buried City Supply Drop Locations: All 9 Call Stations
Predator Threats in the Crystal Zone
The Power Plant Biome is actively patrolled. Know what you’re sharing the water with.
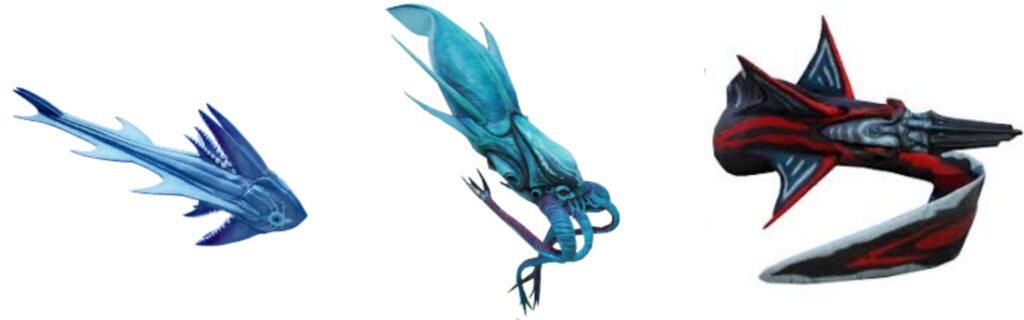
Twin Rays: Aggressive fauna that show up en route, particularly between the Graveyard and Observatory biomes. Fast and persistent. Stay near the seafloor or alien structures to use them as cover.
Collector Leviathan: Present in the broader Angel Comb / Power Plant area. If something very large starts tracking you, cut the Tadpole’s engine and hold still against a structure. Sitting still near cover is more reliable than trying to outrun a Leviathan in open water.
Needlers: Fast, hostile fauna in the deep channels. Flares help deter them. Keep moving through open water and don’t stop to harvest if a Needler is actively engaged.
General rules for the zone: stick close to the seafloor and alien structures, never harvest in open water if something is tracking you, and park the Tadpole in a covered spot before you exit to swim.
The Tadpole can take hits, but a parked vehicle in the wrong spot will take damage you don’t want to deal with.
Building a Temporary Outpost

If you need three or more crystals, which you will, for the Bioscanner alone, setting up a small temporary base near the alien arch is the most efficient approach.
It eliminates the 1,700-meter return trip between harvest runs and lets you refill oxygen, recharge power cells, and wait out the lightning spawn cycle from a fixed position.
The nearby Axum control station also has oxygen and refill options if you’re close enough to use it. Check it before spending materials on your own outpost.
Place beacons on confirmed crystal spawn points and near reliable lightning towers so you can return to productive locations on subsequent sweeps without re-scanning from scratch.
Harvesting Process Step-by-Step
- Arrive at the Power Plant Biome in the Tadpole (Depth Module Mk. 1 installed).
- Park the Tadpole in covered terrain near the alien arch structure.
- Activate the Scanner Room if you’ve built a nearby outpost and set it to search for Conduit Crystal.
- Follow the scanner marker to the first confirmed node. Move carefully; Needlers and Twin Rays patrol these areas.
- Aim the Sonic Resonator at the node and hold the button. The crystal shatters. Pick up the pieces.
- After collecting, scan nearby surfaces on the same cliff wall or seafloor section. Multiple crystals sometimes grow within close range of each other even when the Scanner only pinged one.
- Watch the fallen towers for lightning. When lightning fires, move to the strike point and harvest the new node.
- Repeat until you have what you need. Expect multiple sweeps of the area.
See Also: Upcoming Nintendo Switch Games: Every Release Date for 2026
All Crafting Recipes That Require Conduit Crystal
Conduit Crystal appears in at least six recipes. These are the confirmed ones:
Fabricator Recipes
Improved Fins Basic Fins (1) + Fiber Mesh (1) + Conduit Crystal (1) A solid early upgrade to movement speed. Relatively cheap crystal cost, but easy to skip if you’re prioritizing higher-tier recipes.
Advanced Battery Conduit Crystal (1) + Strong Acid (1) + Silver Ingot (1) Power upgrade for tools and vehicle systems. Directly extends your effective range per dive.
Entangled Power Cell Conduit Crystal (1) + Strong Acid (1) + Gold Ingot (1) + Troilite (1) Late-game power cell. One of the more demanding recipes for resource variety, and this is one of the reasons your crystal stockpile gets eaten up faster than expected.
Modification Station Recipes
Bioscanner Scanner (1) + Enameled Glass (2) + Conduit Crystal (3) The scanner upgrade that unlocks Biomod scanning and advanced biological data.
Three crystals for one item is the recipe most players hit the progression wall on. Getting three crystals is genuinely the target of your first dedicated farming run.
Feedback Resonator Sonic Resonator (1) + Enameled Glass (2) + Conduit Crystal (2) + Strontium (2) The Sonic Resonator upgrade that lets it damage shielded enemies like Bloom Cankers. Without it, certain encounters are a slog. Two crystals for this one.
Practical Farming Tips from the Community

Players on r/Subnautica_2 have logged their actual runs. A few consistent notes:
The 1,900–2,000m east mark is where the most reliable crystal clusters are reported, specifically near the fallen alien towers by the Angel Comb. If you’re at 1,600m and finding nothing, keep heading east.
At least one player’s first find was “on the seafloor in the area of the Collector Leviathan,” which is a stressful first encounter with the resource, but confirms the seafloor in that general zone is worth sweeping even if you can’t find cliff spawns.
“High on a cliff” near the Angel Comb is a consistent spawn location across multiple player reports.
Look up when you’re near the Angel Comb’s outer walls. Crystals on cliff faces are easy to miss if you’re only scanning the seafloor.
The scanner may return only one signal on your first sweep of the area. Grab that node and do a slow manual sweep of nearby surfaces before assuming the area is dry.
Adjacent surfaces frequently have additional nodes the scanner didn’t flag.
See Also: Fallout: Nuka Girl Statue Ships Q3 2026: Pre-Orders Live
Conduit Crystal in Subnautica 2 is genuinely the resource that marks the transition from early scavenging to deliberate expedition planning. You can stumble into most materials.
This one requires a specific vehicle setup, a specific tool, the right biome at the right depth, and enough patience to work the lightning-spawn mechanic until you’ve stockpiled three crystals for the Bioscanner plus two more for the Feedback Resonator.
The Power Plant Biome at 300–400m depth, 1,600–2,000m east of the Lifepod, is where all of it happens. The Sonic Resonator is the only tool that works on crystal nodes.
The lightning-spawn loop near the fallen alien towers is the closest thing to a reliable farm the current build offers.
Set up a temporary outpost, build a Scanner Room, watch the towers, and run the loop until you have what you need.
The Bioscanner and Feedback Resonator are both worth the grind. Once those are in your kit, the mid-to-late game opens up considerably.
FAQs
Conduit Crystal does not spawn near your Lifepod or in casual farming areas. You need to explore deeper biomes and specific locations to locate this mid-game resource efficiently.
Conduit Crystal is needed for multiple important crafts including the Bioscanner recipe, Advanced Battery recipe, and Feedback Resonator blueprint, making it essential for mid-game progression.
Conduit Crystal is a critical resource that gates progression in Subnautica 2, required for several important crafting recipes that are necessary to advance through the mid-game content.
TL;DR
- Conduit Crystal is a rare resource essential for crafting key items like the Bioscanner and Advanced Battery, found in the Power Plant Biome at depths of 300-400 meters.
- Players need to be well-prepared for the expedition, including using the Tadpole submarine with Depth Module Mk. 1, bringing high-capacity oxygen tanks, and setting up a temporary outpost with a Scanner Room.
- Conduit Crystals spawn near points struck by blue lightning from alien devices, which creates a farming mechanic that requires patience and careful observation of the environment.