

TL;DR
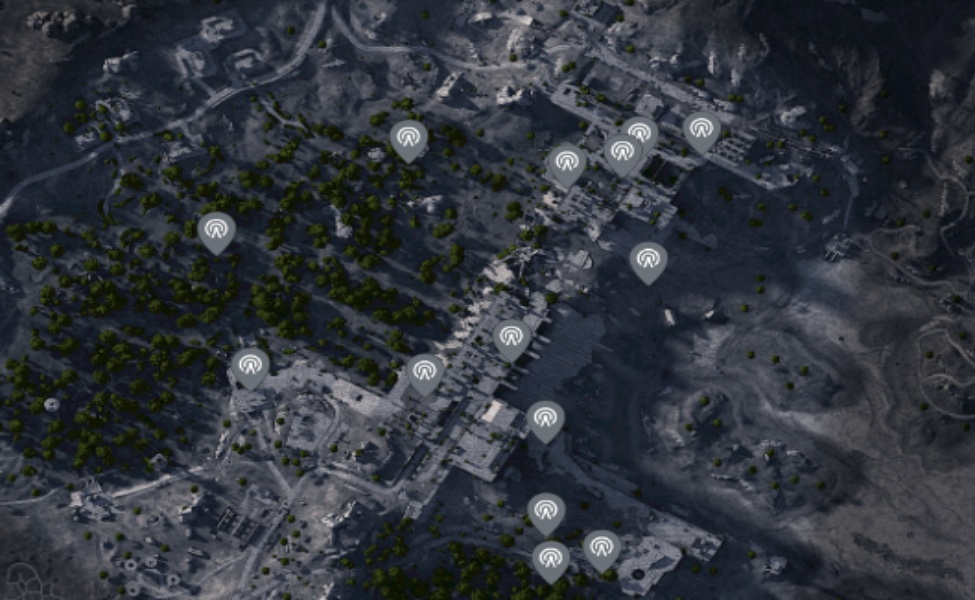
- Buried City offers the most efficient supply drop locations with up to nine call stations, typically four to five active per raid.
- Call stations are single-use per raid, and players must be aware of their activation status to avoid wasting time on inactive stations.
- The recommended rooftop loop includes Plaza Rosa, Piazza Arbusto, Piazza Roma, Library, and Grandioso Apartments for optimal activation speed.
Disclaimer: This summary was created using Artificial Intelligence (AI)
If you’re grinding the “Search Supply Drops” trial or knocking out Tian Wen’s “A Better Use” quest, the Arc Raiders Buried City supply drop locations are your fastest path to points.
Buried City has up to nine call station spawns, and typically four or five go active per raid. Small map, short rotations, rooftop access, and lower player density than the Dam or Spaceport, this is the map you want for supply drop content, full stop.
Here’s everything we know: where the stations are, how they actually work, and how to rotate them without handing your position to another squad.
See also: Take-Two CEO Reaffirms GTA 6 Release: What You Need to Know
How Supply Drop Call Stations Work in Arc Raiders
Before we get into specific locations, understand the mechanics, as many players waste time running to inactive stations or fumbling the activation window.
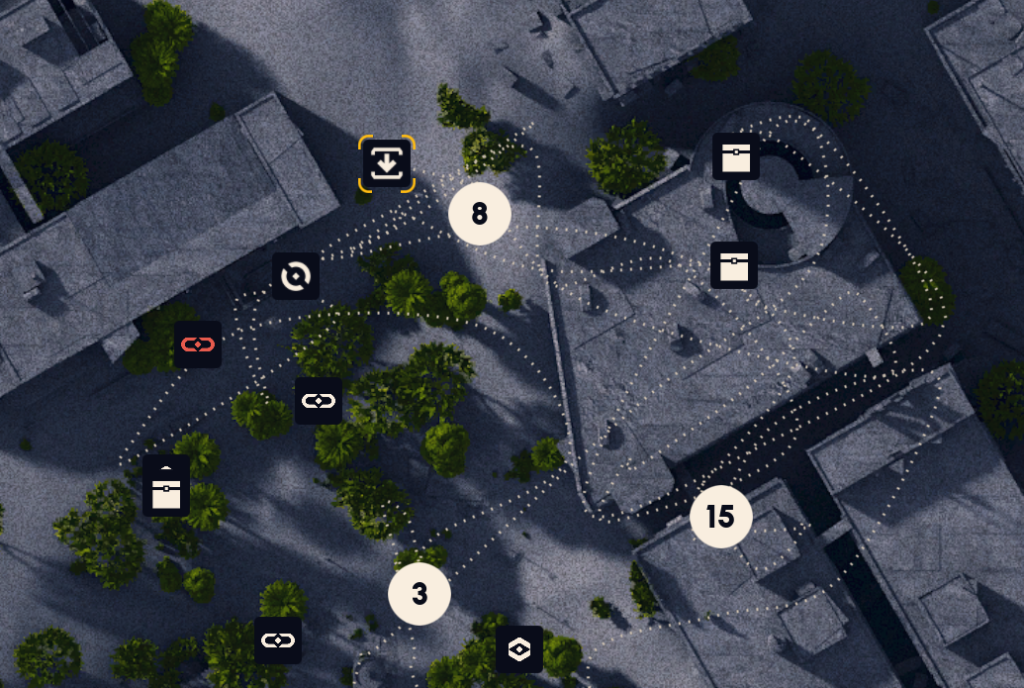
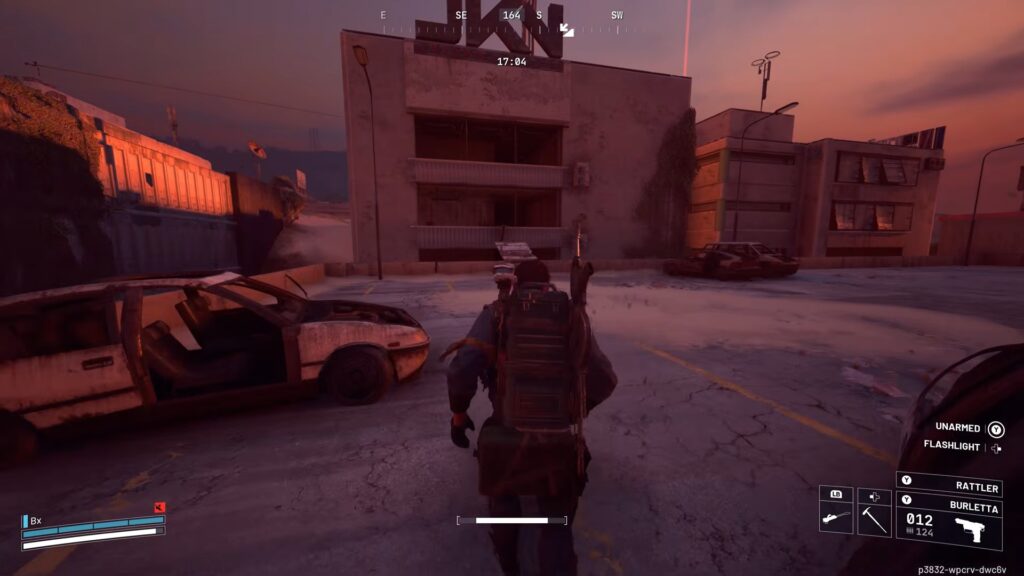
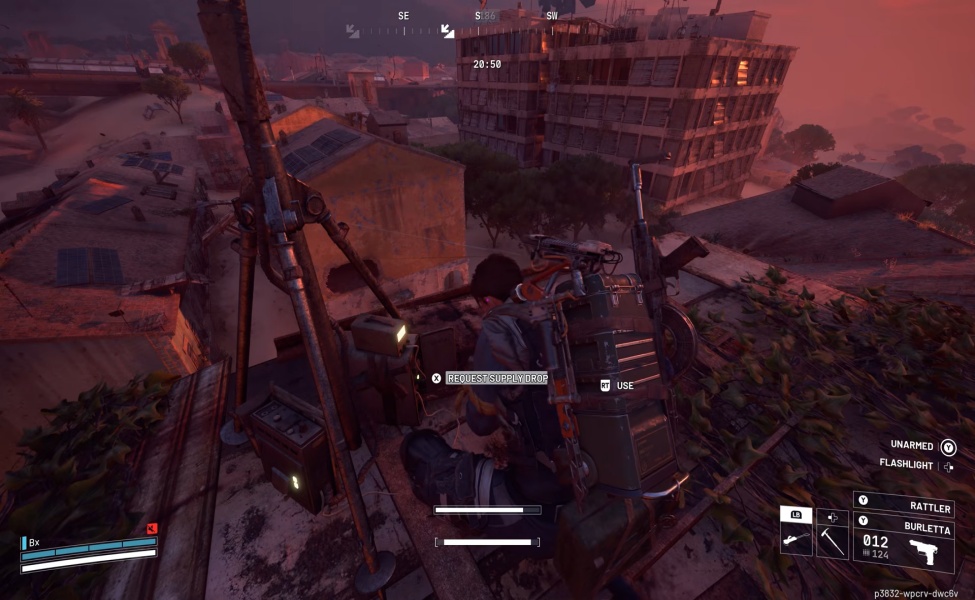
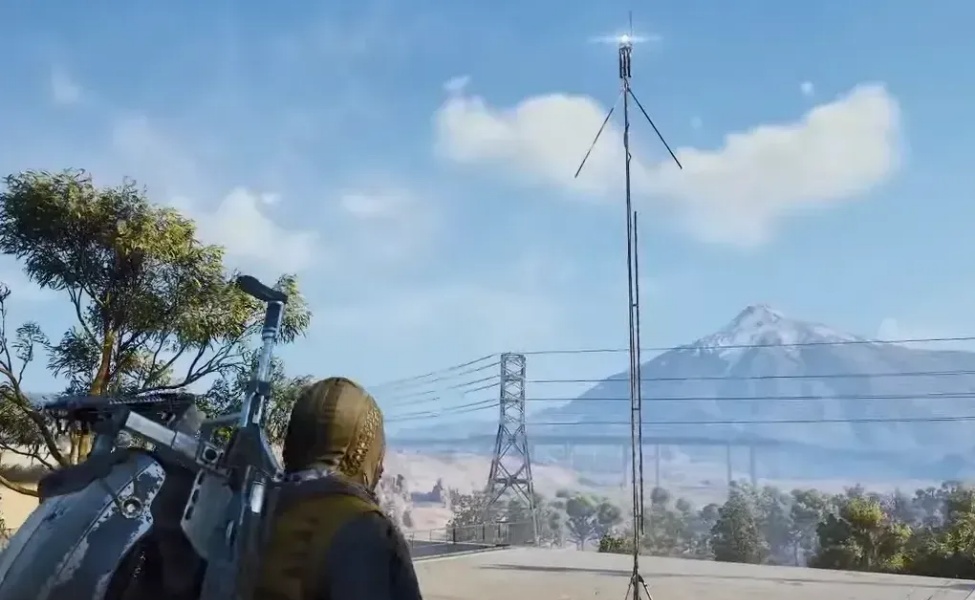
Call stations are fixed physical structures on the map, consisting of tall poles or antenna towers with three downward-pointing prongs at the top and a flashing white light.
That blinking light provides your first visual cue from a distance, especially at night. Up close, you’ll notice a small console or box at the base where you interact.

Calling a Supply Drop
- Walk up to the base of the antenna pole.
- Interact with the console to “Request Supply Drop.”
- A flare fires into the sky; this announces your position to every player and ARC enemy in range.
- Wait roughly 45 seconds. The pod descends on a balloon or parachute.
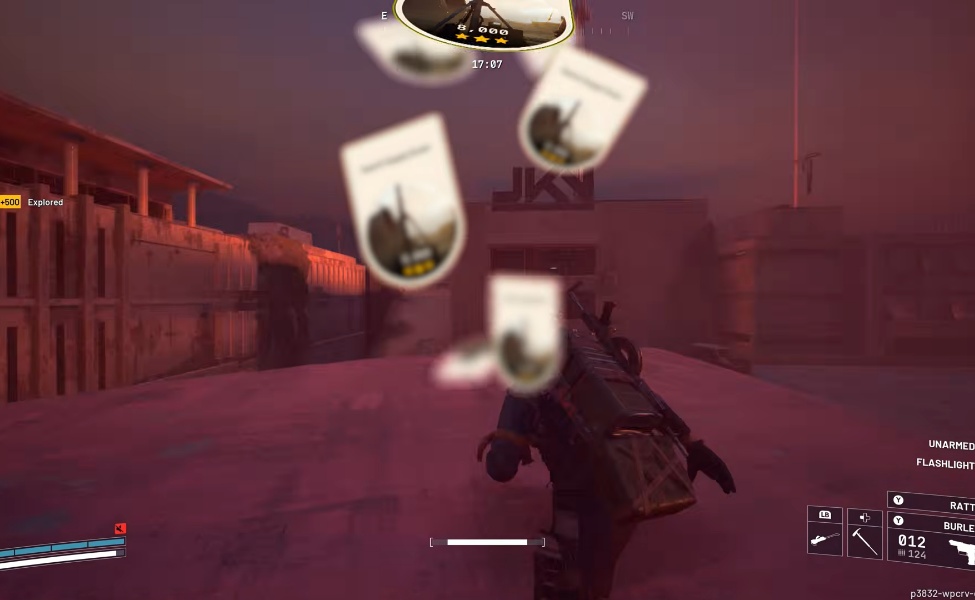
- The pod lands nearby with an audible thud. Crack it open and loot fast.
Drops inside: ammo (light, medium, heavy, shotgun), bandages, grenades (light impact or heavy fuze), shield rechargers, and crafting materials.
Good stuff all around, nothing game-breaking; the real value for most players is the trial score, not the loot itself.
Mechanics You Should Know Before You Run
Stations are single-use per raid. Once a player activates one, it’s done. On a busy server, you can show up to find the console already used. There’s a known bug on some stations that allows a double activation; if you’re farming the weekly trial, this is a free extra points opportunity when it procs.
Not every station activates every raid. Out of nine possible locations in Buried City, typically four to five go live per session. Which ones activate is semi-random, so you need to know all of them and check each one as you rotate. The map icon for a station only appears when you’re physically close, so you can’t pre-confirm actives from the other side of the map.
Weather and time of day affect spawn rates. During Electromagnetic Storms, expect fewer active stations; sometimes zero. Night raids tend to have slightly reduced spawns too, though the blinking lights stand out way more in the dark, which helps with quick visual checks from rooftops. Daytime raids generally give you better spawn rates and a cleaner run overall.
The Gas Station beacon is bugged. The icon appears, the structure is there, but the console doesn’t register interaction. Skip it when you’re on a timer; chasing a dead activation wastes valuable seconds and puts you in the open for no reason.
See Also: Arc Raiders Recycling & Stash Guide, Stop Hoarding Junk!
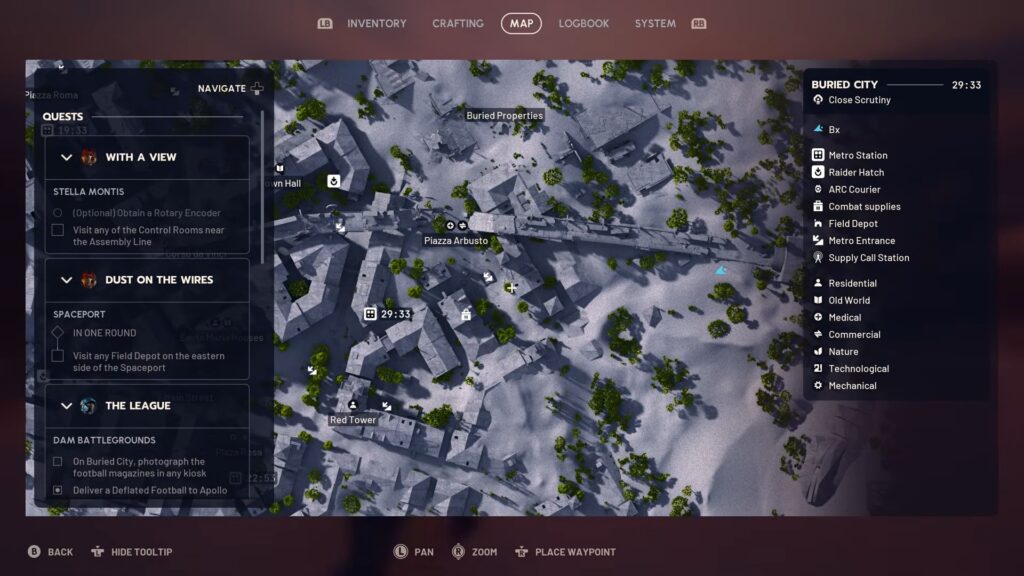
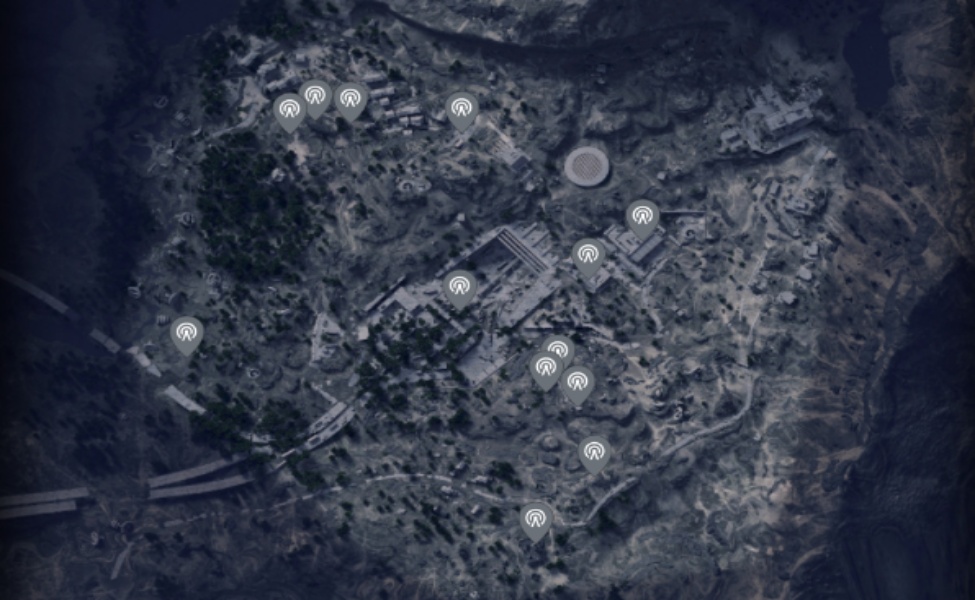
All 9 Arc Raiders Buried City Supply Drop Locations
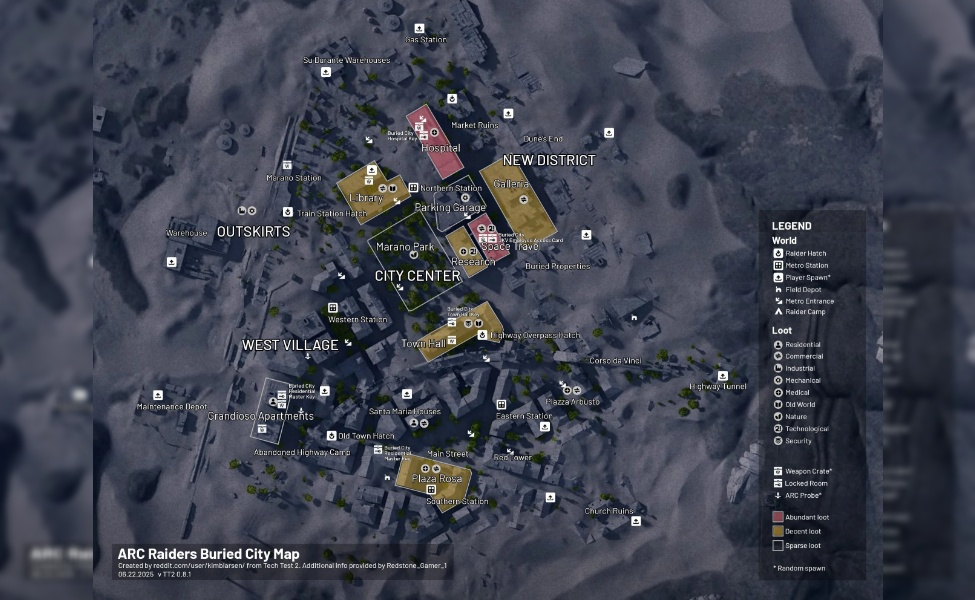
These are fixed physical locations. Activation is random each raid, so treat this as your checklist; hit as many as your rotation allows.
1. Plaza Rosa Roof
One of the most reliable activations on the map. The station sits on the northeast corner of the rooftop. Easy to confirm from adjacent high ground before you commit to climbing.
If you’re starting a supply drop run, Plaza Rosa should be stop one or stop two depending on where you spawn. Consistent activation rate, decent cover while you wait for the pod.
2. Piazza Arbusto Rooftops
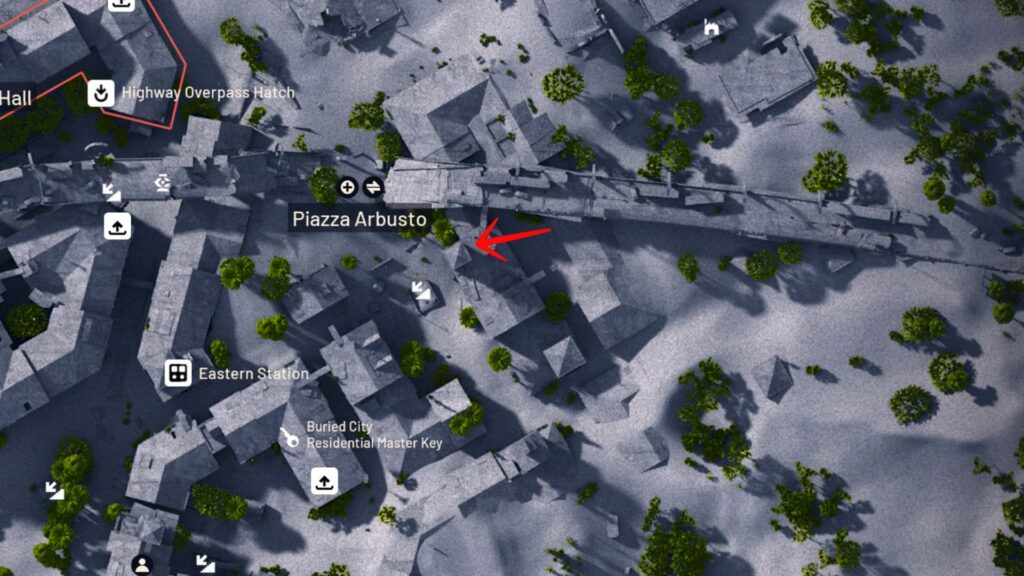
Another high-priority spot and one of the most consistent activations alongside Plaza Rosa. The station is on an elevated rooftop or house structure, to the right of the name on the map.
Getting up here from ground level takes a second, but you can stay elevated and cover the approach angle while the drop timer ticks.
There’s also a rickety bridge crossing east toward the broken highway section that leads to a rooftop near a tower; worth checking during your rotation if you’re already in the area.
3. Piazza Roma Rooftop
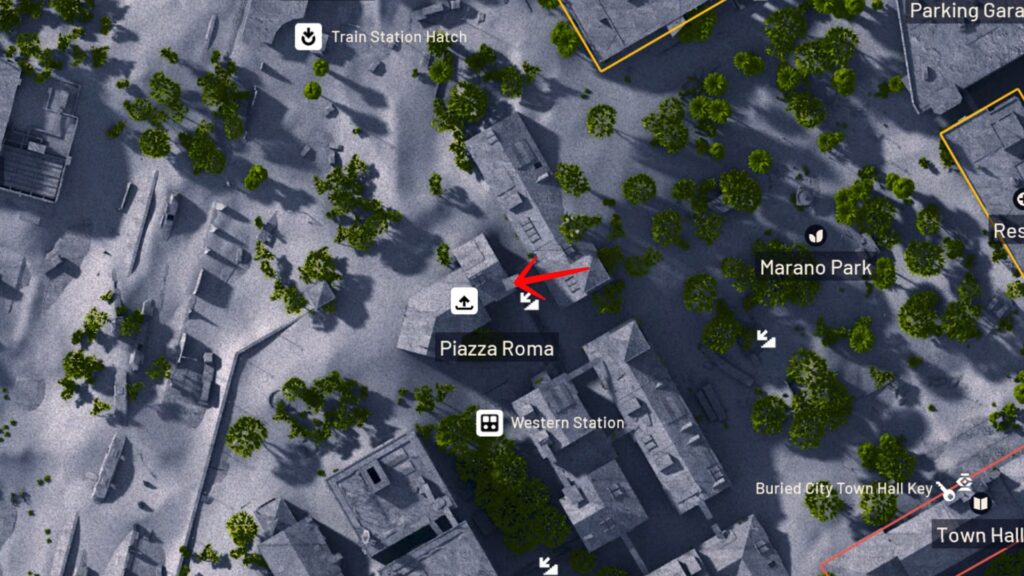
Near a zipline access point, which makes this one fast to hit. Confirm the activation, call it in, and use the zipline to bounce to your next target while the pod is still descending.
The zipline positioning here is one of the reasons Piazza Roma fits cleanly into any clockwise or counterclockwise rooftop loop.
4. Grandioso Apartments Roof
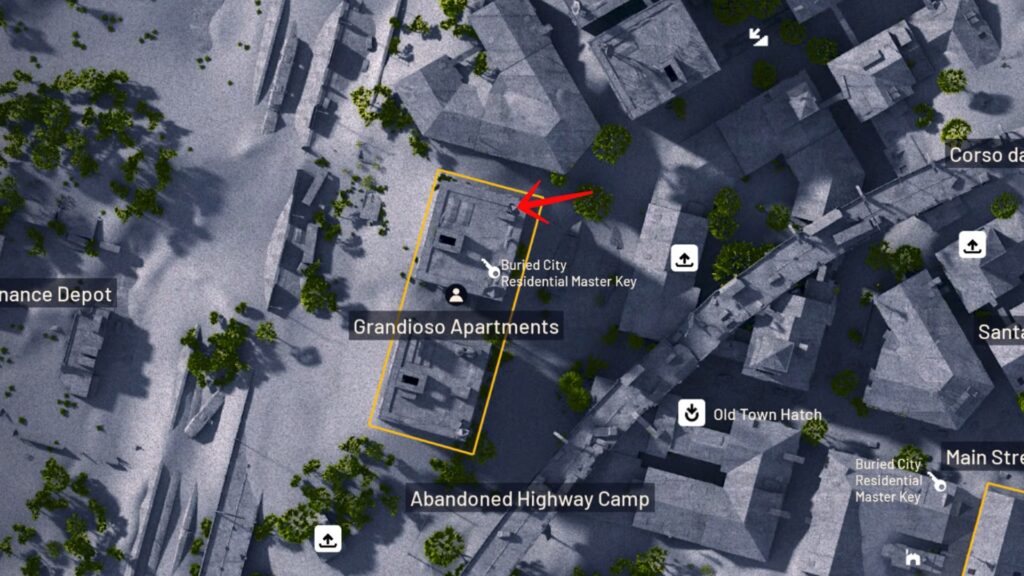
Corner unit on the top floor, south-central part of the map. Access via interior staircase or an interior zipline depending on your entry angle.
Once you’re up, visibility is solid, and you can scan for other players’ flares from here while your own drop is inbound.
If another squad is already running drops, you’ll often spot their activation flares from this height, which tells you which stations are already burned.
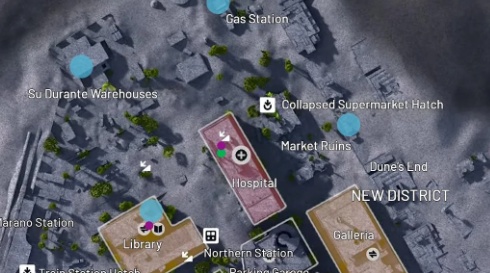
5. Library Roof
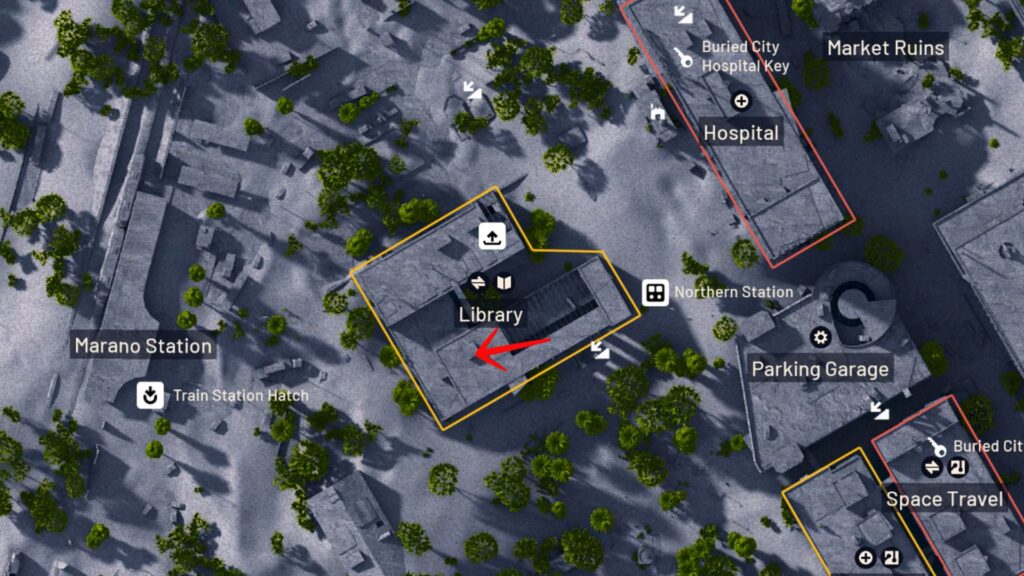
Central map position, which makes it a natural mid-route stop. Quick to confirm from high ground, a reliable spawn rate, and the central location mean you’re never far from your next target, regardless of which direction your route goes.
The Library roof is one of the cleaner activations in terms of ARC enemy density, where you’re not walking into a heavy spawn zone just to reach it.
6. Research Building Roof
Corner rooftop, accessed through the interior. Located south of the New District near the Security area. It sits a bit off the main cluster of plaza spots, which means it sees less competition from other players.
Worth the slight detour if you’re building toward a max score on the weekly trial, especially on quieter servers.
7. Parking Garage Roof
Near the Raiders Refuge area, accessible via stairs. Fast to reach, fast to check. If it’s active, you get your activation in and move on; not a complicated spot. Good mid-route filler if you’re already moving through the southwest portion of the map.
8. Freeway / Highway Middle
The odd one out in terms of positioning, because this station sits in the open middle of the freeway section, not on a rooftop. That exposure is the main downside.
You’re visible during the 45-second wait, you’re on flat ground, and there’s less natural cover against both players and ARC. Solo players should evaluate whether the server population makes this one worth hitting or whether burning it is an acceptable risk.
On low-pop raids, it’s fine. On a busy server, you’re basically flaring your position in the open.
9. Gas Station Roof (Currently Bugged)
The station physically exists on the gas station rooftop and the icon shows up on your map. The console doesn’t work.
Skip this one entirely until a patch addresses it; chasing an unresponsive activation when you’re on a 45-second drop timer elsewhere isn’t worth it.
See also: LEGO Batman Legacy of the Dark Knight: Release Date, Specs, and Price
Additional Confirmed Locations
Beyond the nine primary spots, a few additional stations have been cross-referenced by the community:
- South of West Village, within the building complex
- Northwest of Old Town, near the highway, on top of buildings
- East of Buried City, near the buried structures
- South of New District, in the Security area
These overlap with or are adjacent to some of the nine listed above depending on how you categorize map zones.
When in doubt, run the primary nine first; if you’re still chasing points after that, these secondary confirmations can fill gaps.
See Also: Arc Raiders Expedition Rewards, Reset & System Explained
Best Solo Rotation Route for the Weekly Trial
The “Search Supply Drops” trial rewards points per activation, not per drop looted. That changes how you approach the run: you want activation speed, not looting time.
Pop the console, wait for the pod, crack it fast if you want the contents, then move immediately to the next station. Don’t sit on the drop if you’re in a high-traffic area.
Recommended rooftop loop (clockwise from north):
Piazza Arbusto → Plaza Rosa → Piazza Roma → Library → Grandioso Apartments → Research Building → Parking Garage → Freeway (situational)
Skip the Gas Station. Hit the Freeway based on server traffic; if it’s quiet, grab the easy activation; if it’s hot, skip it and loop back through any missed rooftop spots.
A clean run through five or six active stations on a normal raid puts you around 9,600 trial points. If you hit a double-activation bug or find a rare sixth active station, you can push past 11,000. Either way, Buried City is the most efficient map for this content by a wide margin.
Loadout for this run: Cheap kit. You’re not here to fight. Photoelectric Cloak (photocloak) to break ARC aggro after flare launches, Adrenaline for sprint cooldown between rooftops, and whatever weapons you don’t mind losing.
The risk-to-reward math on bringing a fully kitted loadout just to pop call stations doesn’t work; save the good gear for actual loot runs.
See also: Find Conduit Crystal in Subnautica 2: Fast Farming Guide
Risk-to-Reward: Which Stations Are Actually Worth It
Not all nine stations carry equal value when you factor in exposure, ARC density, and player traffic.
Tier 1 (Hit every time): Plaza Rosa, Piazza Arbusto, Piazza Roma, Grandioso Apartments, Library. All rooftop, all consistent activation rates, zipline access nearby on several of them. These five alone can complete most trial requirements on a good server.
Tier 2 (Hit if the route allows): Research Building, Parking Garage. Slightly off-path from the main plaza cluster but fast to confirm. Low PvP risk because they’re out of the main traffic lanes. Good for padding your score if you’ve already cleared the Tier 1 spots.
Tier 3 (Situational): Freeway. Exposed position, flat ground. Fine on a quiet server, a liability if the map is busy. Read the server before committing.
Skip: Gas Station. Bugged. Not worth your time until it’s patched.
Dealing With ARC Enemies After a Drop Activation
Every flare launch is a noise and visual event. ARC enemies in the area will react. This is what usually happens and how to deal with it without burning your loadout:
The moment the flare goes up, activate your Photoelectric Cloak if you have it. This breaks line of sight with nearby ARC and gives you a few seconds to reposition before they lock onto you again. If you’re on a rooftop, move laterally; don’t just stand at the console waiting for the pod.
Keep moving in a small perimeter so you maintain proximity to the landing zone while staying out of a static position that ARC can walk directly toward.
When the pod lands, breach it and grab what you need fast. Heavy fuze grenades and shield rechargers are usually the highest practical value for continuing the run.
If you’re carrying a tight inventory, prioritize ammo type over quantity; you don’t need five stacks of light rounds if you’re running a heavy weapon.
The third-party risk from other players is real, especially on Piazza Arbusto and Plaza Rosa since those are the most-known spots.
Your flare advertises the activation to the whole server. If you see someone else’s flare go up nearby while you’re waiting on your own pod, expect company. Get in, loot fast, move before they arrive.
See Also: Arc Raiders First Person Mode: The Exploit That Went Viral
PvP Choke Points and Where Players Camp Near Supply Drops
The two biggest ambush spots in Buried City’s supply drop circuit:
Plaza Rosa approaches: Ground-level entrances to the building are the most common camp position. Players who’ve already looted their own drop sometimes sit the stairwells or the ground floor exit waiting for whoever comes to check the rooftop. Use the ziplines to approach from the outside rather than walking interior stairs if you’re suspicious of another squad.
Piazza Arbusto east crossing: The rickety bridge and rooftop approach east of Piazza Arbusto is a natural choke. It’s a single-file crossing with limited cover. Check before you commit; if someone is already up there or watching from the adjacent highway area, you’re walking into a bad angle.
For everything else on the rotation, rooftop-to-rooftop movement via ziplines and snap hooks keeps you out of the ground-level kill corridors where extraction campers and third-party squads tend to operate. The height advantage also helps you confirm flares from other stations without exposing yourself.
How Arc Raiders Buried City Compares to Dam and Spaceport for Supply Drops
1. Arc Raiders Dam Supply Drop Locations
The Dam map is larger with more spread-out call stations. Rotations take longer, travel distances between stations eat into your raid timer, and the higher player density means more competition for active spawns.
The Dam has more points of interest pulling players away from supply drop content, which cuts both ways; fewer dedicated supply drop runners but also more chaotic PvP if a fight spills into your rotation path.
2. Arc Raiders Spaceport Supply Drop Locations
Spaceport is a bigger, more vertical map with industrial structures that make rooftop navigation less consistent.
Station locations are spread across a larger footprint, and the PvP risk is higher given the map’s popularity for mid-tier loot content. Doable for supply drop grinding, but not efficient compared to Buried City.
3. Blue Gate Supply Drop Locations in Arc Raiders
Blue Gate has a more linear layout with fewer total call station spawns. It can work for players who prefer smaller player counts, but the spawn pool is limited and the map offers fewer zipline shortcuts for fast rotation.
All in all, Buried City is the go-to for supply drop content. Smaller map, tight rooftop cluster, zipline network, and consistent activation rates. The community has settled on this for good reason.
Quick Tips for New Players Running Buried City Supply Drops
Go in with a cheap loadout. The drops you get out won’t justify risking your best gear, and the trial points are the actual goal.
Climb to high ground the moment you land. Scan for blinking white lights; at night they’re obvious, in daylight you’re looking for the antenna silhouette. Other players’ flares also tell you which stations are active and where the competition is.
Use the interactive map at mapgenie.io/arc-raiders/maps/buried-city or arcraidershub.com/maps/buried-city to pre-plan your route before you queue. Filter for Supply Call Stations specifically so you’re not scrolling through every map icon.
If you hit the double-activation bug at a station, take it. Free points, no downside.
Don’t push the Gas Station. Skip it. Move to the next confirmed location and keep your rotation tight.
Ziplines and snap hooks are faster than stairs for rooftop access. If you’re walking up interior staircases on every building, your rotation is going to bleed time.
See Also: Arc Raiders Cold Snap Update: Winter Event and Meta Changes
The Arc Raiders Buried City supply drop locations are some of the most consistently farmable content in the game right now, especially if you’re chasing weekly trial points or the Tian Wen quest line.
Nine possible spawns, four to five active per raid, tight rotation distance, and a zipline network that lets you chain them fast. The rooftop loop through Piazza Arbusto, Plaza Rosa, Piazza Roma, the Library, and Grandioso Apartments covers your best-odds spots in a single pass.
Stay elevated, run cheap gear, pop the Cloak after your flares, and keep moving. The supply drop run in Buried City is one of the few things in an extraction shooter where the answer is genuinely “slow down to fight less, speed up to extract more.” Skip the Gas Station until it’s fixed. Respect the Freeway exposure. Rotate the rooftops.
That’s the run.
FAQs
Buried City has up to nine call station spawns total, with typically four or five going active during each raid.
Tian Wen's quest called 'A Better Use' requires you to search supply drops in this location.
Buried City offers the fastest path to points due to its small map size, short rotations between locations, and rooftop access for quick supply drop collection.
TL;DR
- Buried City offers the most efficient supply drop locations with up to nine call stations, typically four to five active per raid.
- Call stations are single-use per raid, and players must be aware of their activation status to avoid wasting time on inactive stations.
- The recommended rooftop loop includes Plaza Rosa, Piazza Arbusto, Piazza Roma, Library, and Grandioso Apartments for optimal activation speed.