

TL;DR
- Zenless Zone Zero (ZZZ) combat mechanics differ significantly from other HoYoverse games, focusing on stagger pressure, anomaly buildup, and timing instead of raw DPS.
- Impact is a crucial stat that enhances stun buildup and chain attack opportunities, fundamentally changing team performance beyond just damage output.
- Anomaly Proficiency and Anomaly Mastery are essential for characters that rely on triggering anomalies, with Proficiency affecting damage and Mastery influencing trigger frequency.
Disclaimer: This summary was created using Artificial Intelligence (AI)
The Zenless Zone Zero Combat Stats & Mechanics Guide exists for one reason: ZZZ does not play like other HoYoverse games, and if you treat its stats like Genshin or Honkai, you will build characters wrong. Very wrong.
On the surface, Zenless Zone Zero looks like flashy action combat with fast swaps and stylish finishers. Under the hood, though, it’s a tightly controlled system built around stagger pressure, anomaly buildup, chain timing, and conditional scaling, not raw DPS stacking. Stats matter, but only when you understand what they’re feeding into.
This Zenless Zone Zero Combat Stats & Mechanics Guide breaks down every core combat stat and mechanic in the game, explains how they interact, and shows how to actually build teams and agents around them. If you’ve ever wondered why your damage feels inconsistent, why enemies suddenly melt after a stun, or why some builds feel godlike while others flop, this is the missing manual.
How Zenless Zone Zero Combat Actually Works (High-Level Overview)
Zenless Zone Zero combat is not about sustained rotations. It’s about creating windows.
Most encounters revolve around three phases:
you pressure enemies → you break their balance → you unload everything during stun or chain windows. Stats, kits, and team roles are all designed to accelerate or exploit that loop.
Unlike Genshin, where damage ramps continuously, ZZZ rewards timing precision. A well-timed chain attack with the right agent stats will outperform sloppy high-ATK builds every time. This is why understanding mechanics matters more than chasing numbers.
See Also: Lucia Zenless Zone Zero Build Guide – Skills, Teams & Gear Tips

Zenless Zone Zero Combat Stats Guide (What They Actually Do)
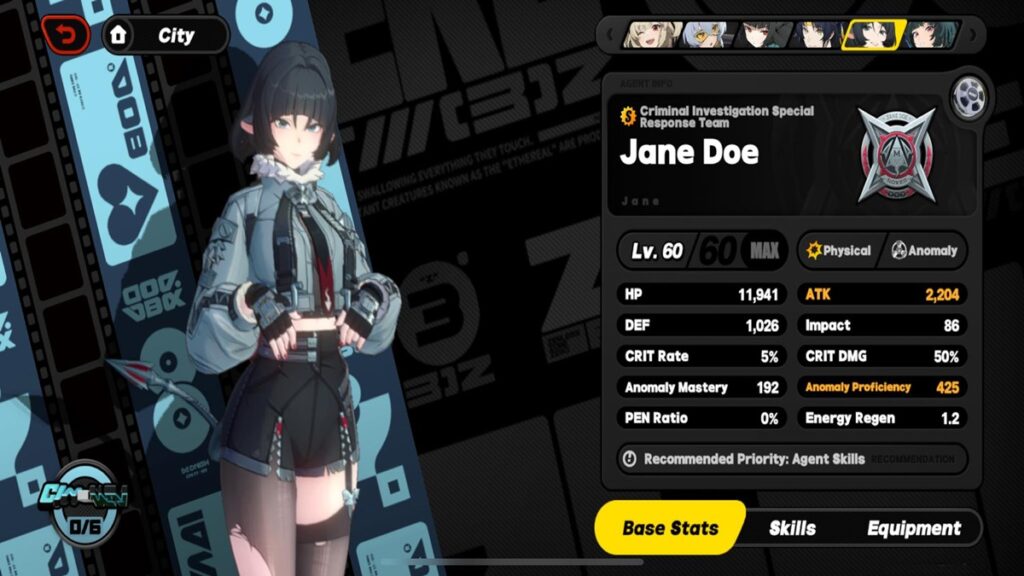
Attack (ATK): Your Base Damage Anchor
ATK is exactly what you think it is. It’s your baseline damage scaling. Normal attacks, skills, EX skills, and ultimates all reference ATK somewhere in their multipliers.
However, ATK alone rarely defines strong builds in ZZZ. Once you hit reasonable thresholds, other stats often provide higher effective damage per second because they improve when and how often you can deal damage, not just how hard you hit once.
ATK matters most for:
- Direct DPS agents
- Burst-focused characters who unload during stun windows
- Early progression before substats diversify
Impact: The Most Underrated Stat in ZZZ

Impact determines how quickly an agent can break enemy balance and trigger stun states. This is one of the most important differences between Zenless Zone Zero and other HoYoverse games.
Higher Impact means:
- Faster stun buildup
- More frequent chain attack opportunities
- Shorter time spent “tickling” tanky enemies
In practice, Impact is what turns a team from “feels slow” into “why is everything stunned already?”
A casual example:
Two teams with identical DPS stats will perform wildly differently if one has a high-Impact attacker. The faster stun lets the whole squad unload their strongest abilities instead of trading chip damage.
Defense (DEF): Survival, But Also Tempo
DEF reduces incoming damage, but in ZZZ it also indirectly affects combat flow. Getting staggered or forced to dodge repeatedly slows down stun buildup and chain timing.
DEF matters more in:
- Hollow Zero and late-game modes
- Melee agents who stay in danger zones
- Longer encounters where mistakes add up
You’re not stacking DEF to face-tank, you’re stacking it so your rotation doesn’t fall apart.
Crit Rate & Crit DMG: Burst Amplifiers, Not the Foundation
Crit stats function traditionally: Crit Rate determines chance, Crit DMG determines payoff. The twist is when crits matter.
In Zenless Zone Zero, crit stats shine hardest during:
- Stun windows
- Chain attack bursts
- Ultimate dumps
Outside those moments, crits are nice but not game-changing. This is why many optimized builds prioritize Impact or Anomaly stats first, then layer crit on top once the core loop is stable.
PEN Ratio & PEN Value: Late-Game Damage Insurance
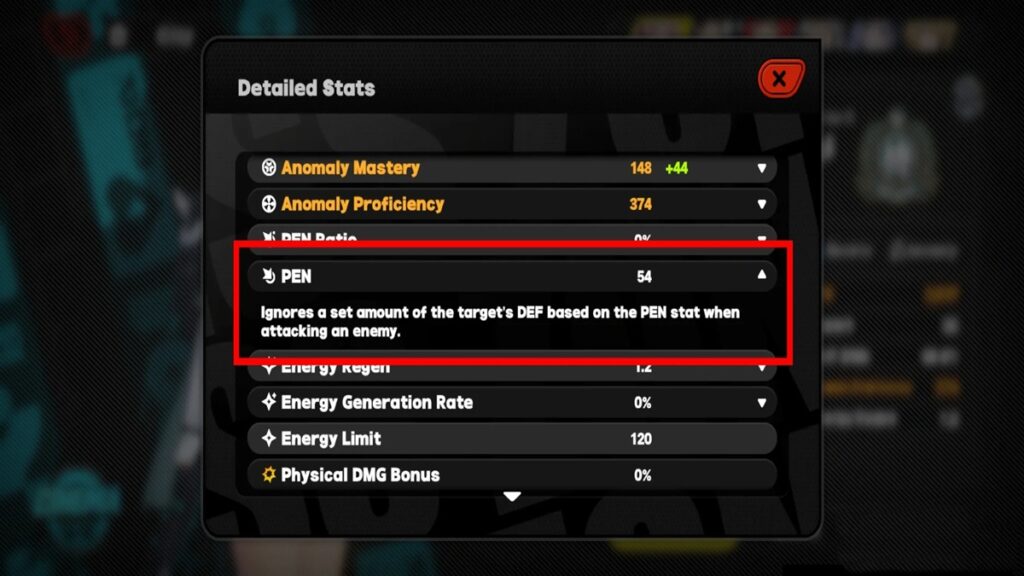
Defense penetration stats allow damage to bypass enemy defenses. These stats scale better as enemies get tankier and content ramps up.
They’re especially valuable in:
- Endgame Hollow content
- Boss fights with inflated DEF
- Teams that already stun reliably and want higher burst ceilings
Think of PEN as your answer to “Why does my damage fall off later?”
Anomaly Proficiency
Anomaly Proficiency increases the damage dealt when an Attribute Anomaly triggers. It does not affect how fast Anomalies build, it only determines how hard they hit once they activate.
If your Agent’s kit revolves around triggering Anomalies, low Proficiency means weak payoffs even if you’re triggering them constantly. This stat scales separately from ATK and CRIT, making it essential for Anomaly-focused characters.
Anomaly Mastery
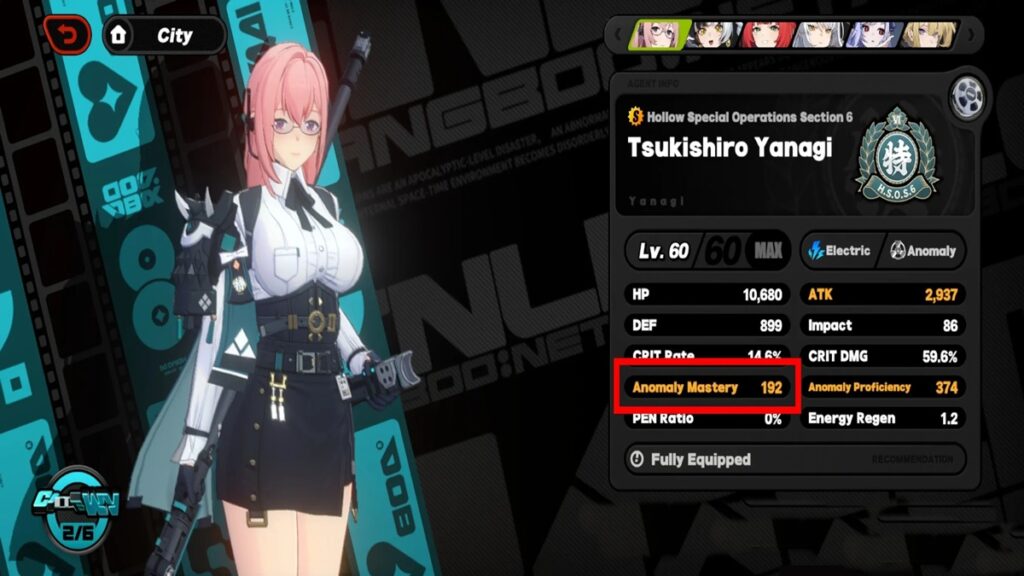
Anomaly Mastery controls how quickly Attribute buildup fills. Higher Mastery means Anomalies trigger more frequently, allowing sustained pressure in longer fights.
Mastery doesn’t increase damage directly. Instead, it increases consistency. Without enough Mastery, short combat windows can end before an Anomaly ever triggers.
Anomaly Mastery vs Anomaly Proficiency
Mastery decides when Anomalies happen. Proficiency decides how much damage they deal. Anomaly Agents need both. One without the other leads to either weak procs or inconsistent triggers.
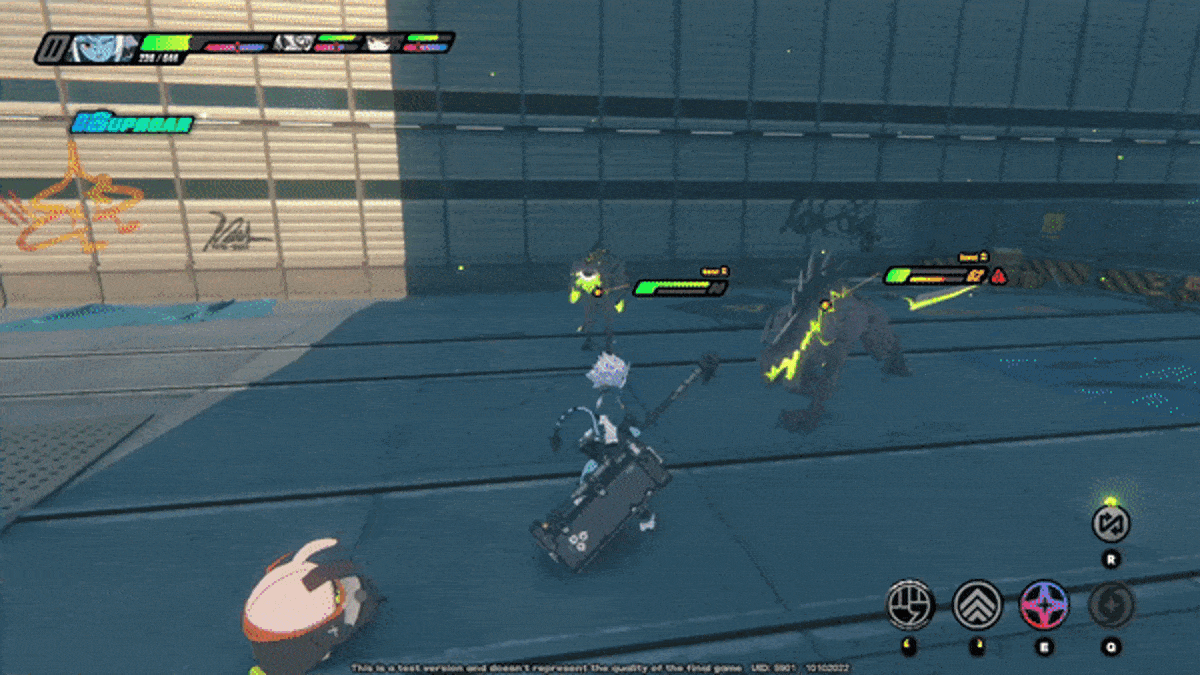
Impact and Daze
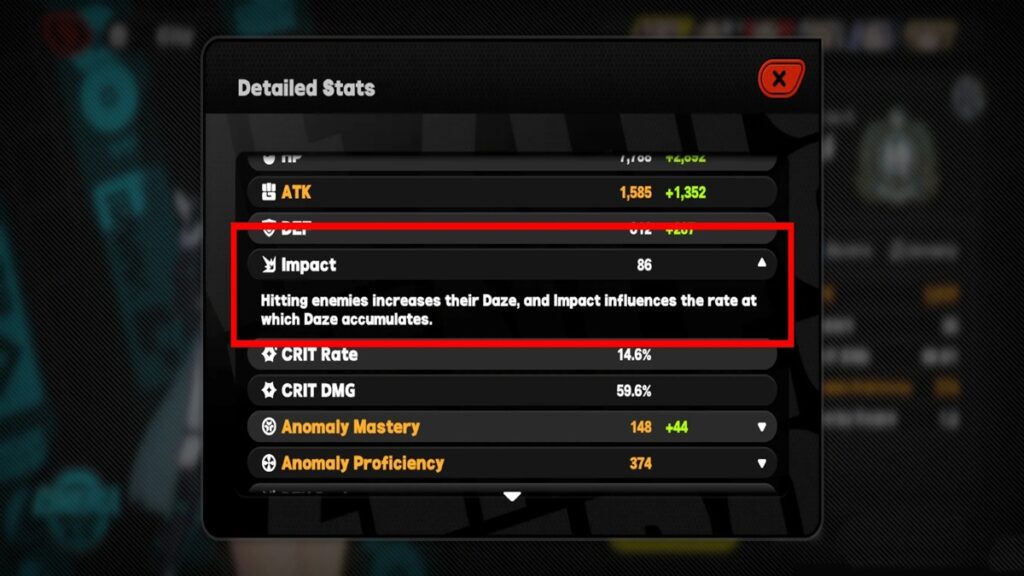
Impact determines how fast your attacks build Daze on enemies. Daze fills an invisible meter, and once it’s full, the enemy becomes Stunned.
Impact doesn’t boost damage numbers directly, but it defines combat tempo. Faster Stuns mean more burst windows, more Chain Attacks, and higher team DPS overall. Especially against bosses with massive health pools.
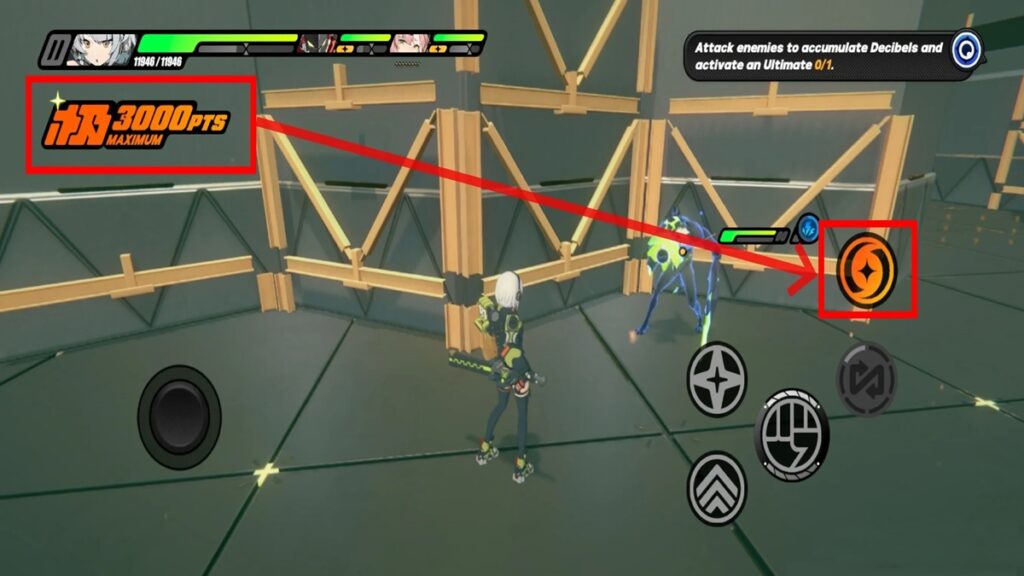
Energy and Decibels
Energy fuels EX Special Skills and is generated through normal combat actions. Each Agent manages their own Energy meter, making rotation timing important.
Decibels power Ultimates. They build through nearly everything you do like basic attacks, skills, dodge counters, and Assists. When an Ultimate is used, Decibels reset to zero, so timing them during Stun windows matters more than spamming them on cooldown.
See Also: Yidhari Zenless Zone Zero: Kit Breakdown & Farm Guide
Zenless Zone Zero Combat Mechanics Guide
How Stun Works in ZZZ
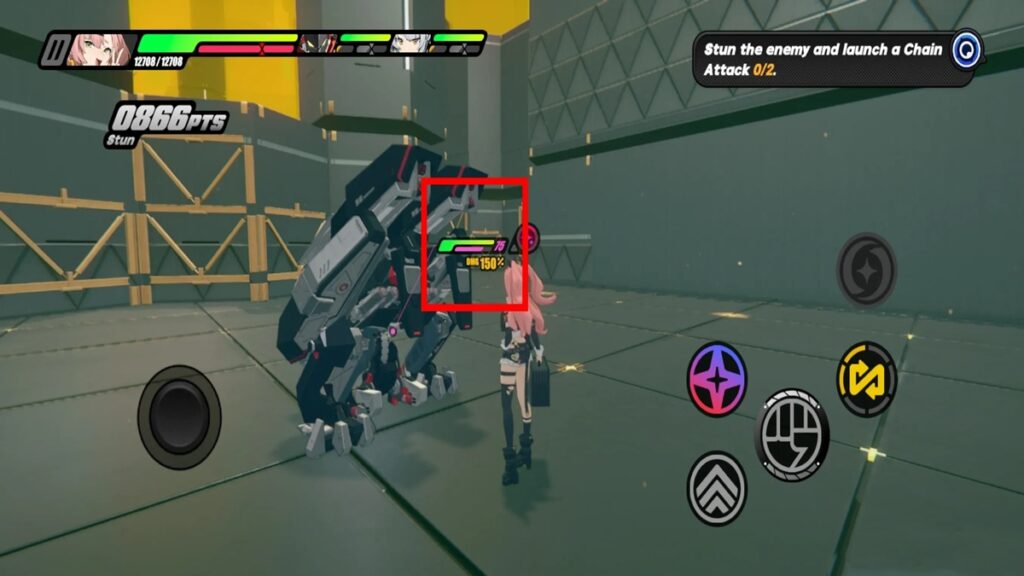
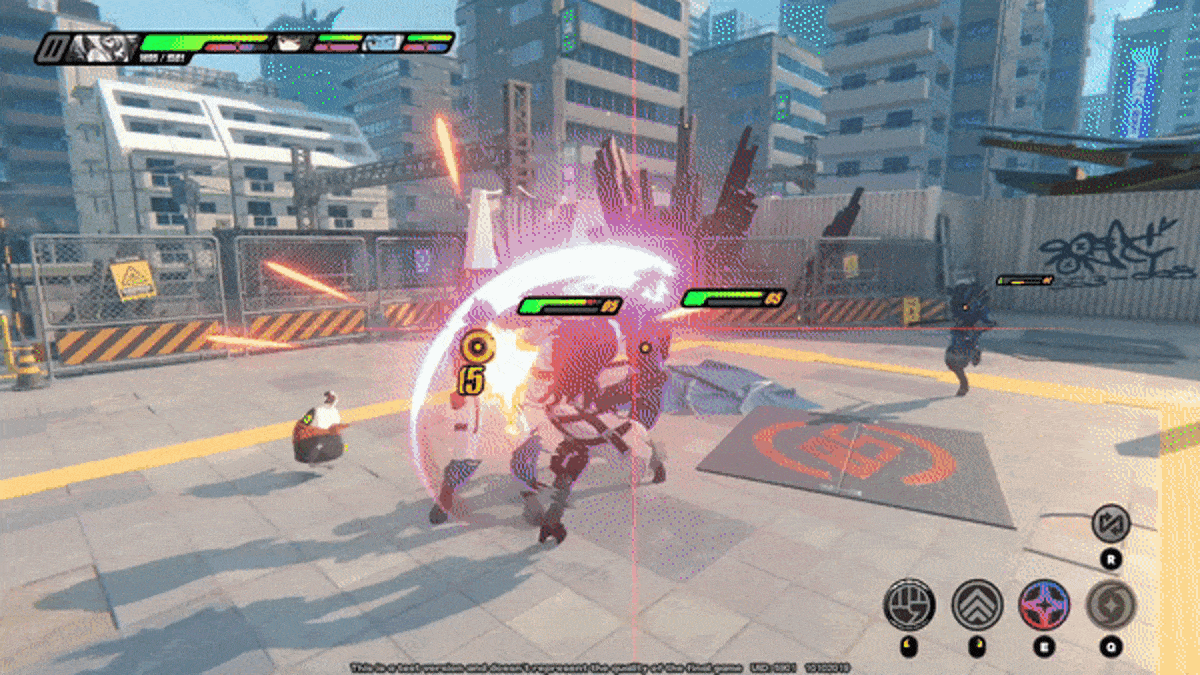
Stun triggers when an enemy’s Daze gauge fills completely. Stunned enemies are immobilized and take increased damage from all sources. This is the single most important damage window in Zenless Zone Zero combat.
Enemy type affects Stun duration. Normal mobs stay down longer, while elites and bosses recover faster. After Stun ends, the Daze meter resets.
Chain Attacks Explained
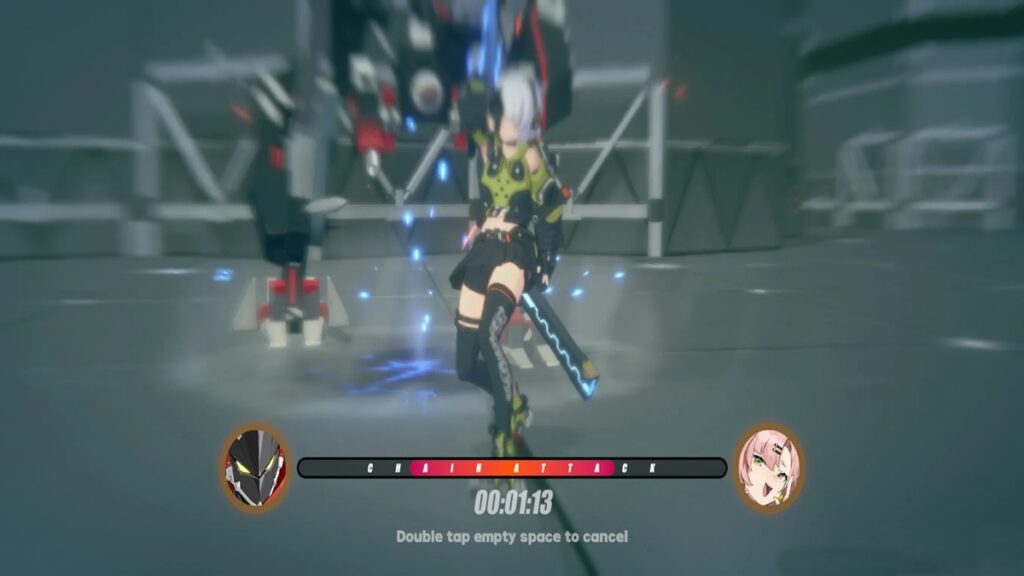
Chain Attacks activate when you hit a Stunned enemy with specific attacks. They allow multiple Agents to jump in sequentially, unleashing powerful coordinated strikes.
Each Agent typically participates once per Chain sequence. Poor ordering or slow inputs can waste the Stun window, so execution matters.
Attribute Anomalies
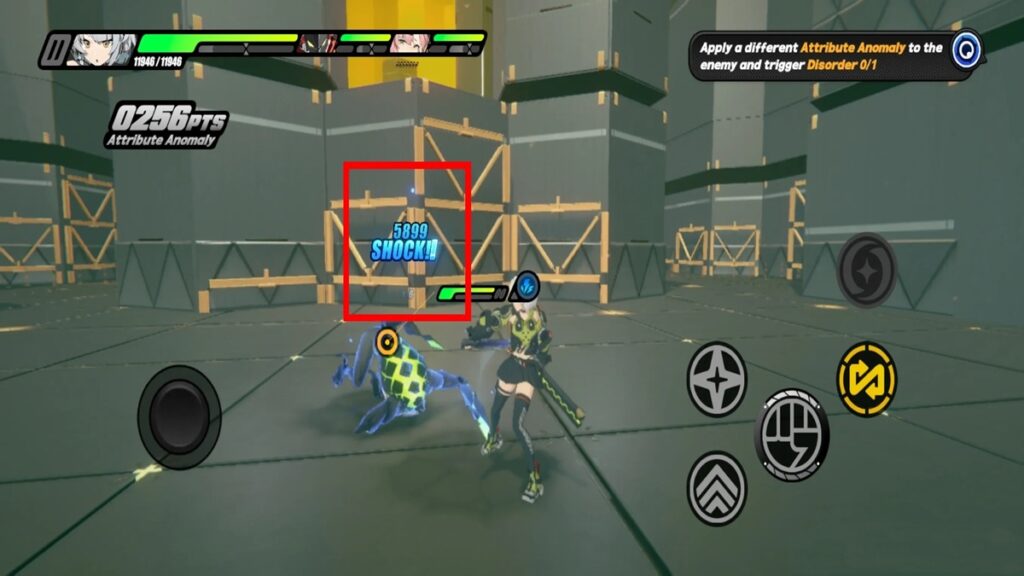
Attribute Anomalies trigger when enough elemental buildup is applied to an enemy. Each Attribute applies unique effects or damage. Anomalies are a core damage source for specific Agent archetypes.
Enemies can only hold a limited number of Anomalies at once, making timing and rotation planning critical.
Disorder
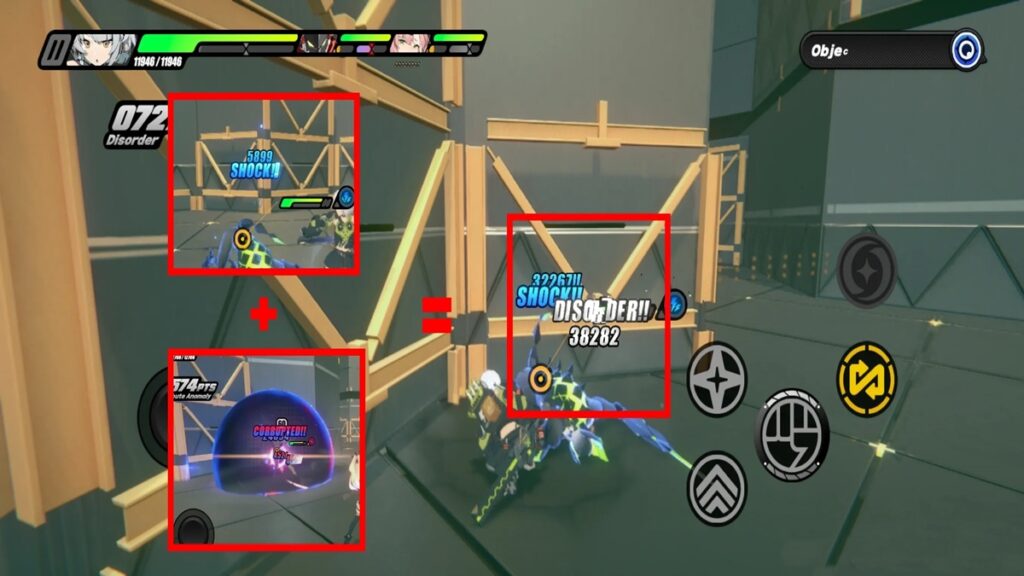
Disorder triggers when a second Attribute Anomaly is applied while another is already active. It deals bonus damage based on the triggering Anomaly’s stats.
This system rewards multi‑Attribute teams and smart rotation swaps. Disorder does not require enemies to be Stunned, making it a powerful damage source outside Stun windows.
Aftershock Mechanics
Aftershock is a conditional bonus hit triggered by certain abilities, passives, or W‑Engine effects. It’s not universal—only Agents or equipment that explicitly mention Aftershock can trigger it.
Aftershock damage is calculated separately and can contribute to Anomaly buildup, making it quietly powerful when optimized correctly.
Defensive Combat Mechanics Guide In Zenless Zone Zero
Dodging Basics
Dodging provides brief invincibility frames and repositioning. Repeated dodging without timing awareness leaves you exposed once those frames end.
Perfect Dodge and Dodge Counters
A Perfect Dodge occurs when you dodge at the exact moment an enemy flashes red or gold. This triggers slow motion and opens a counter window.
Dodge Counters let you turn defense into offense, dealing damage while staying safe. Mastering this mechanic dramatically improves both survivability and DPS.
Assists Overview
Assists allow Agents to intervene during enemy attacks or ally actions. They replace traditional blocking mechanics and emphasize reaction timing.
Parry Assist
Parry Assists negate damage entirely when timed correctly and can interrupt heavy enemy attacks. Miss the timing, and you take full damage.
Evasive Assist
Evasive Assists avoid damage instead of blocking it, making them safer against wide or unblockable attacks.
Quick Assist
Quick Assists allow immediate follow‑up attacks after certain Assists or combat events. They keep rotations fast and pressure constant.
See Also: Zenless Zone Zero Harumasa Build Guide: Best Gear & Teams
Zenless Zone Zero’s combat isn’t just stylish, it’s deeply systemic. Which is why you needed this Zenless Zone Zero Combat Stats & Mechanics Guide. Understanding how stats, Stun, Anomalies, Assists, and resource mechanics interact lets you control fights instead of reacting to them.
If you’re optimizing builds, pulling new Agents, or preparing for harder content, mastering these mechanics is what turns good teams into broken ones. And when you’re ready to upgrade your roster, you can top up Zenless Zone Zero on Joytify for fast, safe, and smooth progress without breaking your rhythm.
FAQs
ZZZ has unique stat mechanics and combat gameplay that differ significantly from Genshin Impact and Honkai Star Rail. Building characters with stats from other HoYoverse games will result in suboptimal builds in ZZZ.
ZZZ emphasizes flashy action combat with fast character swaps and stylish finisher moves. The gameplay prioritizes dynamic, skill-based combat rather than traditional stat scaling.
Understanding ZZZ's unique stat system prevents new players from making costly character building mistakes based on knowledge from other HoYoverse titles. Proper stat allocation is crucial for creating effective combat builds.
Why buy Monochrome from a random site when you can Zenless top up at Joytify? Trusted platform with complete payment options for US gamers.
TL;DR
- Zenless Zone Zero (ZZZ) combat mechanics differ significantly from other HoYoverse games, focusing on stagger pressure, anomaly buildup, and timing instead of raw DPS.
- Impact is a crucial stat that enhances stun buildup and chain attack opportunities, fundamentally changing team performance beyond just damage output.
- Anomaly Proficiency and Anomaly Mastery are essential for characters that rely on triggering anomalies, with Proficiency affecting damage and Mastery influencing trigger frequency.