

TL;DR
- Seele has become a more powerful hypercarry character post-Novaflare (Version 4.2) with significant improvements to her damage output and action efficiency.
- Her talent, Resurgence, provides an extra turn and an 88% damage boost for 3 turns when she secures a kill, enhancing her kill chain capabilities.
- The best Light Cones for Seele include 'In the Night' as the signature option, with 'The Hell Where Ideals Burn' and 'Cruising in the Stellar Sea' being strong alternatives.
Disclaimer: This summary was created using Artificial Intelligence (AI)
If you’re hunting the best build for Seele in Honkai Star Rail, you’re in the right place. Post-Novaflare (Version 4.2), she hits harder, moves faster, and her kit flows better than it ever has.
She’s still the same kill-hungry hypercarry the Hunt path is known for, but now the skill ceiling on playing her well is actually rewarding to hit.
So we cover everything, from her full kit breakdown, optimal relics and ornaments with exact main stats, light cone rankings from signature down to F2P, premier team compositions, and every ascension and trace material you’ll need.
Seele’s Skills & Kit Overview (Post-4.2) in Honkai Star Rail
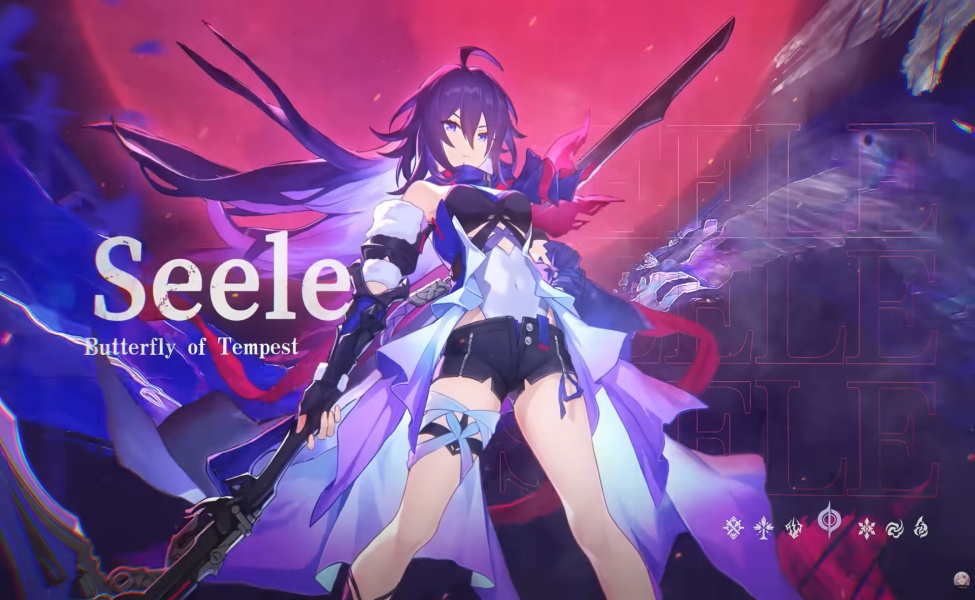
Seele is a 5-star Quantum character on the Path of The Hunt. Her entire identity is built around Resurgence, the talent that gives her an extra turn whenever she secures a kill with a Basic ATK, Skill, or Ultimate.

That extra turn also puts her into the Amplification state, which is an 88% DMG boost for 3 turns.
The key word there is “3 turns” now. Before 4.2, that was 1 turn, which meant you were racing the clock every single rotation. Not anymore.
Basic ATK — Thwack
Two-hit Quantum DMG to one target at roughly 110% ATK. Low priority in most rotations, but it’s your SP-neutral option.
The A6 trace, Rippling Waves, advances Seele’s next action by 20% after a Basic, so it’s not dead value; it’s worth weaving in when you need to preserve SP without losing momentum.
Skill — Sheathed Blade
This is the bread and butter. 396% ATK Quantum DMG across 4 hits, and it bumps her SPD by 25% for 3 turns.

The massive 4.2 change: if an ally attacks an enemy sitting at 50% HP or below, Seele’s Skill fires automatically; no SP cost, no energy, once per turn. If there’s no valid target at that threshold, it redirects to the lowest-HP enemy.
This auto-trigger is the biggest quality-of-life addition in the patch. It means any ally’s attack can now feed Seele’s kill chain, which opens up team flexibility and reduces how punishing SP management used to be.
Ultimate — Butterfly Flurry
120 Energy cost, 792% ATK Quantum DMG single-target. The multiplier got bumped up noticeably in 4.2.
The Ultimate doesn’t consume her turn, so you can queue it during animations to extend her action chain.
It also immediately puts her into Amplification state; you don’t need a kill to get the buff, which matters for consistency.
Talent — Resurgence
Kill any enemy with Basic, Skill, or Ultimate and you get an extra turn plus Amplification state (88% DMG, 3 turns).
Kills during the Resurgence extra turn don’t chain into another Resurgence; there’s a hard cap there. But the new Nightshade trace (A2) stacks +50% DMG per enemy defeated, up to 3 stacks for +150% total.
The A4 trace, Lacerate, gives +25% Quantum RES PEN while in Amplification state, which stacks on top of Genius of Brilliant Stars’ DEF ignore against Quantum-weak enemies.
Technique — Phantom Illusion
Stealth for 20 seconds. Attacking from stealth guarantees a CRIT Skill hit on battle entry and immediately grants Resurgence.
This is your standard dungeon-clear opener and it makes the first turn of any fight genuinely threatening.
Trace Priority
Skill > Talent ≈ Ultimate > Basic ATK. For the three major traces: Lacerate (A4) > Rippling Waves (A6) > Nightshade (A2). Lacerate’s Quantum RES PEN is the most impactful of the three so yeah, don’t skip it.
See Also: Honkai Star Rail Banner Schedule: All Banners & History
Best Seele Build in Honkai Star Rail

Building Seele requires a strict balance of raw Attack and near-perfect Critical statistics. Because her kit naturally provides immense Speed buffs and massive innate Damage% multipliers, running too much Speed on your gear will severely dilute your overall damage output.
Best Light Cones for Seele
Selecting the right Light Cone depends entirely on your team composition and whether you run an action-forward support like Sparkle. Here is the competitive meta ranking for Seele’s weapons:
- In the Night (5-star — Signature BiS, ~55%+ endgame usage)
The classic best-in-slot. Grants CRIT Rate and scales Basic and Skill DMG based on SPD (up to 6 stacks at 160 SPD), plus CRIT DMG on Ultimate.
Seele’s Skill pushes her past most SPD breakpoints without any SPD boot investment, so she hits those stacks easily. At E2, she can double-stack the Skill SPD buff, making 160 SPD straightforward; and that’s when this cone fully pops off.
- The Hell Where Ideals Burn (5-star — Often BiS in Sparkle teams, ~25–55% usage)
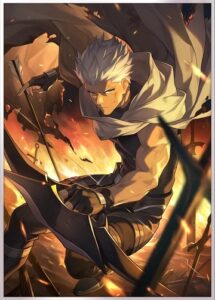
Competes hard with In the Night in ATK-ramp compositions. It gives CRIT Rate plus stacking ATK% on battle start and Skill uses.
The synergy with Sparkle’s SP generation is what makes it work: Sparkle feeds Seele’s Skills, Seele stacks the LC buff, and the ATK multiplier climbs fast.
If you’re running Sparkle as your primary support and have this cone, test it against In the Night; it can pull ahead.
- Cruising in the Stellar Sea (5-star — Best accessible option, Herta Store)
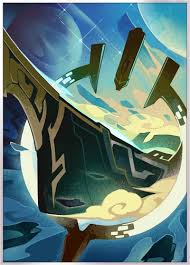
The F2P ceiling. Gives CRIT Rate (doubled against enemies below 50% HP; exactly when Seele auto-triggers her Skill) and ATK% on kills.
The kill synergy is essentially purpose-built for Seele’s playstyle. At S5, it’s competitive with standard 5-star options and genuinely good. If you’re not pulling limited LC banners, get this one.
- Sleep Like the Dead (5-star — Standard banner stat stick)

High base CRIT DMG. The passive (CRIT Rate on a non-CRIT Skill hit) is awkward since you want consistent crits, but the raw CRIT DMG stat is solid. Fine if you pulled it from the standard banner.
- Swordplay (4-star — Single-target bossing pick)

Stacks DMG% when hitting the same target across turns. In single-target content without target swapping, it stacks to decent numbers. Falls off in multi-wave content.
- Only Silence Remains (4-star — Low-enemy content pick)

ATK% and CRIT Rate when there are 2 or fewer enemies. Reliable passive in small enemy count fights.
The performance drop-off from signature to F2P is real but manageable. Cruising in the Stellar Sea at S5 keeps Seele competitive.
The bigger damage gap usually comes from relic quality and team composition, not the light cone.
Best Relics and Planar Ornaments
For Seele, ignoring enemy defenses is the highest value multiplier you can chase, making her classic relic domain irreplaceable.
1. Relic Set: 4-Piece Genius of Brilliant Stars

- 2-Piece Bonus: Increases Quantum DMG by 10%.
- 4-Piece Bonus: When the wearer deals DMG to the target enemy, ignores 10% of their DEF. If the target enemy has Quantum Weakness, the wearer ignores an additional 10% of their DEF.
- Note: DEF ignore scales multiplicatively. When combined with defense shredders like Silver Wolf or Pela, this set completely eclipses any alternative options like the Scholar Lost in Erudition set.
2. Planar Ornament Set: 2-Piece Rutilant Arena
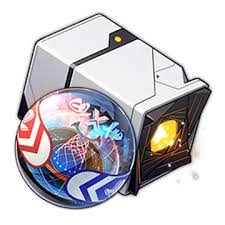
- 2-Piece Bonus: Increases the wearer’s CRIT Rate by 8%. When the wearer’s current CRIT Rate reaches 70% or higher, Basic ATK and Skill DMG increase by 20%.
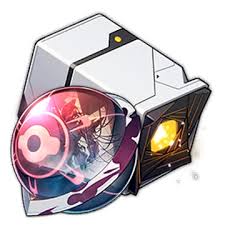
- Alternative: If you run Seele at E2 or effortlessly hit the 160 SPD threshold in combat, Firmament Frontline: Glamoth is a highly competitive alternative that boosts overall damage by 12% to 18%.
Main Stats and Substat Priority
| Piece | Main Stat |
|---|---|
| Body | CRIT Rate (preferred) or CRIT DMG |
| Feet | ATK% (~82% of endgame builds) |
| Sphere | Quantum DMG% |
| Rope | ATK% (~93% of endgame builds) |
Why ATK% on Feet? Seele’s Skill already gives her a 25% SPD boost, so SPD boots are a wasted main stat slot in almost every build.
Energy Recharge on the Rope is also unnecessary given her 120 Energy cost and how frequently she generates it through kills.
Substat Priority
CRIT Rate = CRIT DMG > ATK% > SPD
Target Thresholds
| Stat | Floor | Goal |
|---|---|---|
| CRIT Rate | 70% | 80–100% |
| CRIT DMG | 150% | 160–200%+ |
| ATK | 2600 | 2900–3300+ |
| SPD | 115 (base) | 115–130 |
The 1:2 CRIT Rate to CRIT DMG ratio is the standard target, but pushing CRIT Rate to 80%+ first gives more consistent damage across the board.
Missing a CRIT on Seele’s Ultimate when you needed the kill to proc Resurgence is one of the more painful moments in endgame content. Consistency matters.
For SPD: 115 base gets her to roughly 143 with Skill active. That’s enough for 2 turns in the first and third cycle of most content.
If you can push to 130 base without sacrificing CRIT stats, do it. Just don’t run SPD boots for it unless you’re specifically targeting 160 SPD for E2 + Glamoth.
See Also: Honkai Star Rail 4.2 Phase 2: Evanescia Meta Build & Pull Guide
Best Team Compositions for Seele

Seele pairs with SP-positive supports, DEF shredders, and anything that enables faster kills. The 4.2 buffs made her more flexible, but a few setups clearly pull ahead.
Seele Hypercarry (Premium)
| Slot | Unit | Role |
|---|---|---|
| DPS | Seele | Main carry |
| Support | Sparkle | SP recovery + CRIT DMG/ATK/Vulnerability |
| Support | Cerydra | SP restoration + repeated Skill triggers |
| Sustain | Permansor Terrae or Luocha  | Shields + ATK buffs / SP-neutral healing |
Sparkle + Seele is the strongest core pairing. Sparkle feeds SP back to Seele, advances her actions, and her CRIT DMG buff is massive.
Cerydra adds Skill duplications that keep Seele in kill-chain territory longer. Permansor Terrae (DHPT) reduces enemy HP (making the 50% auto-Skill threshold easier to hit), provides shields and ATK buffs, and unlocks BananAmusement Park as a planar option.
Luocha is the clean sustain substitute; his healing triggers on Resurgence without burning SP.
Mono-Quantum (Universally Strong)
| Slot | Unit | Role |
|---|---|---|
| DPS | Seele | Main carry |
| Debuffer | Silver Wolf | Quantum weakness implant + DEF shred |
| Support | Sparkle or Fu Xuan | Action advance + CRIT DMG / CRIT Rate + mitigation |
| Sustain | Fu Xuan or Lynx | Shields + CRIT Rate / Healing + SP |
Silver Wolf implants Quantum weakness on any enemy, which means Genius of Brilliant Stars gets its full 20% DEF ignore regardless of what you’re fighting.
Stack Silver Wolf’s passive DEF shred on top of that and Seele is cutting through defenses in any content.
Fu Xuan’s CRIT Rate buff is a free substat boost. This is the best team for bosses and content without natural Quantum weakness.
F2P / Accessible Team
| Slot | Unit | Role |
|---|---|---|
| DPS | Seele | Main carry |
| Support | Asta | SPD + ATK% buff |
| Support | Pela or Tingyun  | DEF shred / Energy battery |
| Sustain | Natasha or Lynx | Healing |
Asta’s SPD and ATK% buffs push Seele’s action value further. Pela’s DEF shred is SP-free and meaningful.
Tingyun’s energy battery means more Ultimates per cycle, which feeds Amplification state uptime.
Natasha keeps everyone alive. Not as strong as premium setups, but fully capable of clearing MoC 10–12 with decent relics.
SP Management Note
The biggest mistake in Seele teams is building a roster that bleeds SP dry. Without a SP-positive support like Sparkle, lean on Basic ATKs to preserve points and let the 4.2 auto-Skill trigger do work on your other units’ turns.
Don’t Skill into an enemy above 50% HP if a teammate can chip them down first; that free auto-trigger is a full Skill hit with no SP cost.
See Also: Honkai Star Rail Redeem Codes and Livestream 4.2, Grab It Fast!
All Ascension and Trace Materials for Seele
Maxing out Seele to Level 80 and taking her core skills to maximum level requires a dedicated farming plan.
Ascension (Levels 1–80)

| Material | Amount |
|---|---|
| Credits | 308,000 |
| Void Cast Iron | 65 |
| Thief’s Instinct | 15 |
| Usurper’s Scheme | 15 |
| Conqueror’s Will | 15 |
Void Cast Iron comes from Stagnant Shadow:
Shape of Quanta. The Thief’s/Usurper’s/Conqueror’s Will series drops from Simulated Universe or Elite enemies throughout the game.
Max Traces (All skills to 10/10/10)

| Material | Amount |
|---|---|
| Credits | 3,000,000+ |
| Tracks of Destiny | 8 |
| Guardian’s Lament | 12 |
| Arrow of the Beast Hunter | 18 |
| Arrow of the Demon Slayer | 69 |
| Arrow of the Starchaser | 139 |
| Thief’s Instinct | 41 |
| Usurper’s Scheme | 56 |
| Conqueror’s Will | 58 |
Guardian’s Lament drops from Echo of War: End of the Eternal Freeze (Cocolia). Tracks of Destiny come from Nameless Honor, events, or the Starlight Exchange.
Prioritize the Skill trace first, then Ultimate and Talent. The Lacerate major trace at A4 is the single most impactful unlock outside of basic skill levels. Don’t sit on it.
HSR Seele’s Complete Eidolons
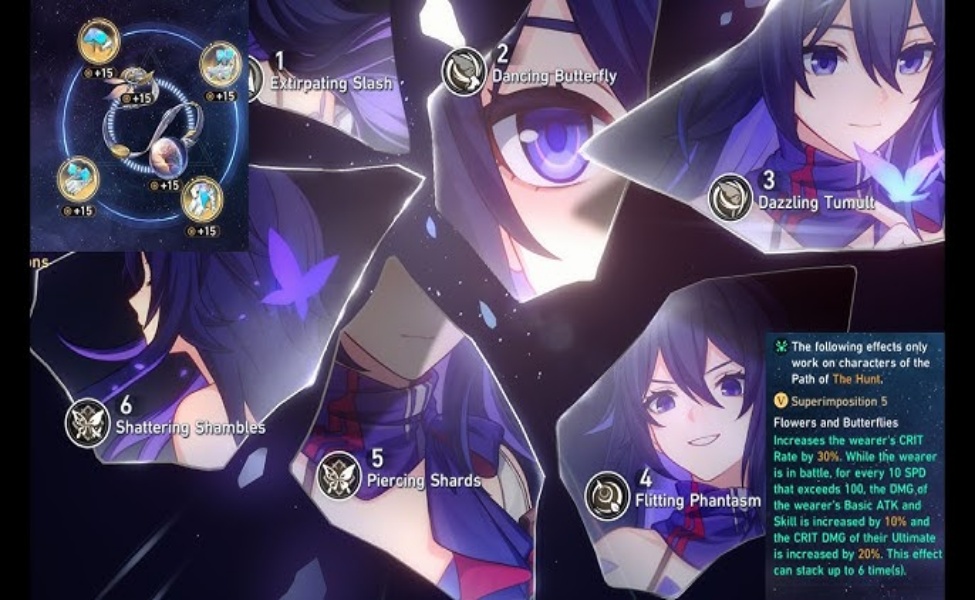
Seele is a complete unit at E0 and there’s no pressure to pull constellations. Some Eidolons are meaningful though.
E1 – Extirpating Slash: +15% CRIT Rate and 20% DEF ignore when hitting enemies at 80% HP or below. This fires constantly given how Seele plays; she’s almost always targeting enemies she intends to kill. Big early spike in consistency and damage.
E2 – Dancing Butterfly: The Skill SPD buff can now stack twice. This is where 160 SPD becomes accessible without SPD boots, which unlocks Glamoth’s max bonus and pushes In the Night to its full stack count. Strong for players optimizing around those specific thresholds.
E3 – Dazzled Tumult: Skill +2, Talent +2. Pure scaling, brings both to level 12.
E4 – Flitting Phantasm: +15 Energy on enemy defeat. Faster Ultimates, more Amplification state uptime. With Resurgence chaining in waves, this can mean an extra Ultimate every 2–3 cycles.
E5 – Piercing Shards: Ultimate +2, Basic ATK +1. More multiplier damage.
E6 – Shattering Shambles: After Seele uses her Ultimate, the target gets the Butterfly Flurry debuff for 1–3 turns. Enemies with this debuff take extra True DMG equal to 30% of Seele’s Ultimate DMG every time any ally attacks them. The bigger change: enemies killed by any unit trigger Seele’s Resurgence, not just kills by Seele herself. That shifts her from a pure solo carry into a team damage amplifier. E6 is a massive powerspike but costs a lot. E0–E2 is the reasonable stopping point for most players; endgame content is fully clearable without going deeper.
See Also: Honkai: Star Rail 4.2 Livestream Date, Banners, and Anniversary Rewards
Perfecting the best build for Seele in Honkai Star Rail means prioritizing raw ATK%, focusing heavily on your CRIT ratios, and using the 4.2 Novaflare mechanical buffs to your absolute advantage.
Pair her with an SP-positive hypercarry engine like Sparkle, and keep her locked into the Genius of Brilliant Stars relic set, and Seele will shred through MoC 12 and Pure Fiction content alike.
Ready to turn up her speed loops and dominate the next few endgame rounds? Ensure you have sufficient resources to pull her light cones, Eidolons, and supports. Top up HSR Oneiric Shard conveniently and speedily at Joytify to power your min-maxing journey today!
FAQs
In Patch 4.2, Seele received improvements that increased her damage output, movement speed, and overall kit fluidity. These changes solidified her position as a top-tier hypercarry without fundamentally altering her playstyle.
Seele follows the Hunt path, which is characteristic of high-damage, aggressive hypercarries designed to eliminate priority targets quickly.
Yes, Seele remains a powerful main DPS and hypercarry option after Patch 4.2, with her improvements making her an even more formidable choice for endgame content. Her skill ceiling has also increased, rewarding skilled players with better performance.
Looking for a place to HSR topup that is safe and fast? Joytify is a go-to for gamers in the Philippines with round-the-clock service.
TL;DR
- Seele has become a more powerful hypercarry character post-Novaflare (Version 4.2) with significant improvements to her damage output and action efficiency.
- Her talent, Resurgence, provides an extra turn and an 88% damage boost for 3 turns when she secures a kill, enhancing her kill chain capabilities.
- The best Light Cones for Seele include 'In the Night' as the signature option, with 'The Hell Where Ideals Burn' and 'Cruising in the Stellar Sea' being strong alternatives.