

TL;DR
- Seele's optimal build focuses on maximizing CRIT Rate and CRIT DMG to ensure her ultimate attack consistently hits, especially after the Novaflare buffs in Version 4.2.
- Seele's Resurgence mechanic now provides three turns of bonus damage after a kill, enabling more reliable damage output and making her rotations less fragile.
- Team compositions for Seele should focus on hypercarry setups that optimize her SP usage and maximize her damage potential, with recommended characters like Sparkle and sustain units.
Disclaimer: This summary was created using Artificial Intelligence (AI)
The Seele best build in Honkai Star Rail relies entirely on absolute precision, calculated Action Values, and enough CRIT Rate to guarantee her single-hit ultimate actually executes the target.
If you’ve been grinding the MoC 12 trenches, you know the absolute pain of Seele missing a CRIT on a crucial reset; it instantly bricks your cycle count.
Thanks to the massive Novaflare buffs in Version 4.2, Seele is back with a vengeance. Her multipliers are cranked, her buff uptime is fixed, and her new auto-Skill mechanic completely redefines her SP economy.
We are breaking down the exact numbers, SPD breakpoints, and relic setups you need to zero-cycle endgame content. Here is how we maximize her Resurgence chains and push her single-target damage to the absolute limit.
See also: Best Jing Yuan Honkai Star Rail Build 2026: Stop Wasting Speed
Seele Kit and Talents in Honkai Star Rail

Honkai: Star Rail Characters
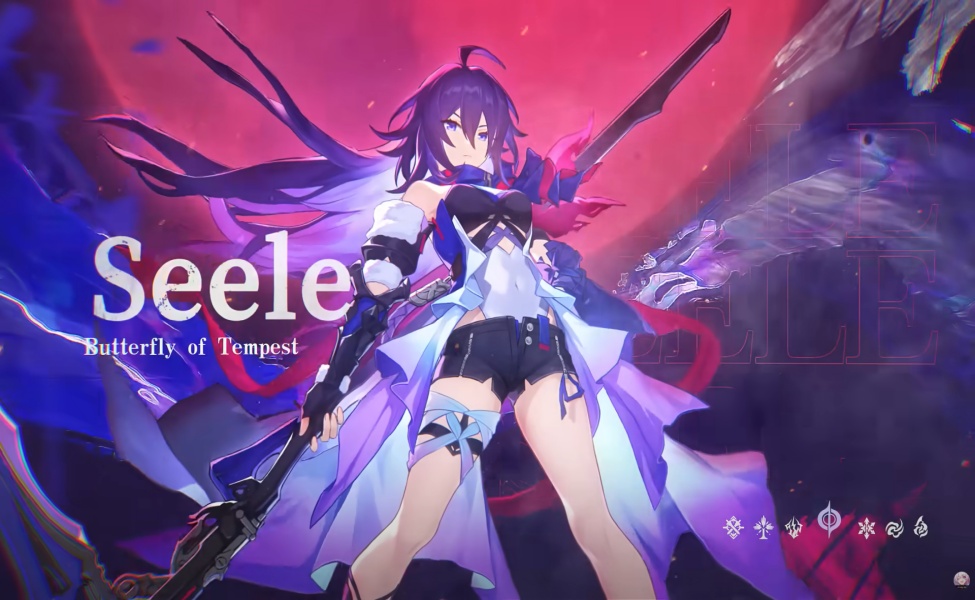
Seele is a 5-star Quantum Hunt character built around single-target burst and action economy.

Her whole kit exists to answer one question: how many extra turns can you squeeze out of a single enemy phase before the boss gets to act again.
The Novaflare update didn’t change that identity, it just made the loop far less fragile.
Sheathed Blade and the Free Auto-cast
Her Skill, Sheathed Blade, hits for 360% ATK across four instances and grants her 25% SPD for three turns.

The real change is the new passive: any time an ally attacks an enemy sitting at 50% HP or below, Seele auto-casts Sheathed Blade for free, no SP and no energy cost, once per turn. If there’s no valid target left, it redirects to whatever enemy has the lowest HP.
This is the single biggest quality-of-life shift in her entire history. Pre-buff Seele lived and died by SP availability. Post-buff, she generates free damage just by existing near a team that chips HP down.
See Also: HSR Redeem Code (April 2026) and Livestream Codes Version 4.2, All Working!
Butterfly Flurry and Amplification
Her Ultimate, Butterfly Flurry, costs 120 energy and deals 720% ATK to a single target while putting her into Amplification.
That state alone is worth chasing: every hit she lands while Amplified hits noticeably harder, and Lacerate (her A4 trace) adds 25% Quantum RES PEN on top of it.
We’ve watched this number on paper for months, and it still doesn’t fully prepare you for what it feels like in an actual MoC 12 boss fight when the Ultimate connects clean.
Resurgence: the extra-turn engine
Resurgence is still her signature mechanic. Land a kill with a Basic ATK, Skill, or Ultimate, and she enters Amplification, takes an immediate extra turn, and deals 80% bonus damage for three turns at max Talent level.
That duration used to be a single turn, which meant missing the follow-up window felt like throwing away half her kit.

Three turns of uptime turns Resurgence from a fragile bonus into a reliable damage state you can plan a whole rotation around.
Stack Nightshade (A2) on top, three kills for 150% bonus damage, and a clean Resurgence chain in Apocalyptic Shadow genuinely looks unfair.
None of this fixes the one thing that will always make you want to throw your phone: watching her Ultimate whiff a crit at 85% CRIT Rate. It happens.
The math says it shouldn’t happen as often as it feels like it does, and that’s exactly why CRIT Rate is non-negotiable on her build.
Best Build for Seele Honkai Star Rail
Building Seele requires strict adherence to stats. You cannot afford dead rolls. Let’s break down the optimal loadout.
Best Light Cones, Ranked
| Light Cone | Relative DPS | Notes |
|---|---|---|
The Hell Where Ideals Burn | ~116% | Best overall once paired with Sparkle’s ATK buff. Front-loaded ramp-up, top pick in premium teams. |
In the Night (signature) | ~106% | SPD-based Skill and Ultimate buffs that stack hardest at E2. Consistent, doesn’t need a specific support to shine. |
Cruising in the Stellar Sea | ~100% (baseline) | The F2P standard from the Herta Shop. CRIT Rate and ATK buffs that trigger off kills, lining up almost perfectly with her loop. |
Swordplay, Only Silence Remains, and Sleep Like the Dead all sit a tier below but remain usable if you’re stuck waiting on a banner.
If you’re choosing between In the Night and her signature’s main competitor purely on accessibility, Cruising in the Stellar Sea is close enough to BiS that we don’t think it’s worth panic-pulling for the others at E0.
Best relics
Genius of Brilliant Stars is still the set to chase. The 4-piece bonus adds flat Quantum DMG and 20% DEF ignore against Quantum-weak targets, which compounds beautifully once Silver Wolf has implanted a weakness on something that wasn’t naturally Quantum-weak.

Scholar Lost in Erudition is a real alternative, sitting around 98.5% relative DPS, and leans more on permanent CRIT Rate plus flat Skill and Ultimate damage if your substat rolls on Genius pieces never come together.
Anyone who’s farmed the Quantum relic domain knows exactly how often that happens. You can sink fifty runs into that domain and still come out with three pieces of SPD-substat garbage and zero usable CRIT Rate bodies.
Best Planar Ornaments

Rutilant Arena is the default pick once you’re sitting above 70% CRIT Rate, since it converts that into bonus Skill damage on top of the CRIT Rate boost.
Firmament Frontline: Glamoth becomes genuinely competitive at E2, where her Skill’s SPD buff doubles and the 160 SPD breakpoint stops feeling like a stretch. At E0 or E1, stick with Rutilant Arena. Don’t build around a breakpoint your Eidolon count can’t reach yet.
Main stat and substat priority
| Slot | Main stat |
|---|---|
| Body | CRIT Rate (preferred) or CRIT DMG |
| Feet | ATK% |
| Sphere | Quantum DMG% |
| Rope | ATK% |
Substat priority runs CRIT Rate and CRIT DMG roughly equal at the top, then ATK%, then SPD. Her base SPD of 115 already clears most relevant thresholds once Sheathed Blade’s buff is active, so ATK% on the Feet piece outperforms SPD for most teams.
Target 70% or higher CRIT Rate, 150% or higher CRIT DMG, and 2,600+ ATK before counting buffs.
Keep the CRIT ratio close to 1:2 and don’t overcorrect into a SPD-heavy build unless you’re specifically chasing a Glamoth breakpoint at E2.
See Also: Honkai Star Rail 4.2 Livestream: Date, Banners, Events & More!
Seele Complete Eidolons in Honkai Star Rail
If you are pushing for zero-cycle clears, her Eidolons drastically shift her breakpoint math.

- E1, Extirpating Slash: against enemies under 80% HP, gain 15% CRIT Rate and ignore 20% DEF. The single biggest power spike in her entire Eidolon tree.
- E2, Dancing Butterfly: her Skill’s SPD buff can stack twice, opening up SPD breakpoints that aren’t realistic at E0.
- E3, Dazzling Tumult: Skill and Talent levels +2 each, capped at 15.
- E4, Flitting Phantasm: +15 energy on every kill, which keeps her Ultimate uptime far more consistent.
- E5, Piercing Shards: Ultimate +2 and Basic ATK +1, both capped higher than base.
- E6, Shattering Shambles: after her Ultimate, the target takes True DMG equal to 30% of that Ultimate’s damage on its next hit taken, and a kill under that effect triggers Resurgence on its own. This is a full identity shift toward sustained pressure rather than pure burst.
E1 is the priority if you only pull one copy. E6 is the one that changes how the character plays, turning her into something closer to a DoT-adjacent hypercarry than a straight burst unit.
The real question most of us are actually asking isn’t which Eidolon matters most, it’s whether E0S0 is enough to clear MoC 12 at all.
It mostly is, with the right supports, but the gap between E0S0 running Cruising in the Stellar Sea and E0S1 holding In the Night is large enough that you’ll feel it on turn one of a hard boss phase.
E2S1 is the comfort zone where SPD breakpoints, Resurgence uptime, and raw burst all line up without forcing compromises.
See Also: HSR Version 4.2 Phase 1: Silver Wolf Breaks Meta?
Best Team Compositions for Seele in Honkai Star Rail
Seele operates best in a hypercarry setup designed to funnel her SP and manipulate the action queue.
Premium Hypercarry
Seele, Sparkle, a sustain unit (Luocha or Gepard work fine, Dan Heng • Permansor Terrae adds ATK buffs and a cleanse), and either Sunday, Robin, or Cerydra for extra Skill copies and SPD support round out the strongest version of this team.

Silver Wolf is a common fifth-slot swap into Sustain’s place when you need guaranteed Quantum weakness implant and DEF shred against bosses that aren’t naturally Quantum-weak.
Timing matters more than people give it credit for. Sparkle’s action advance and CRIT DMG buff have a real window, and dumping your Ultimate the moment energy hits 120 instead of lining it up with that window wastes a huge chunk of her value.
The same goes for Tingyun in budget lineups: her energy buff lands best right before a Skill cast, not after.
Hold the Ultimate one extra action if it means landing it inside an active buff window, then chain into auto-Skills on anything sitting under 50% HP.
When that chain connects, you can watch Seele land four separate attacks in a row off a single kill, and there’s genuinely nothing else in this game that feels as satisfying as watching that Resurgence counter tick over for the third time in one cycle.
F2P-friendly team

Seele, Asta for SPD and ATK support, a Trailblazer in either Harmony or Remembrance for action advance, and Natasha or another budget healer covers the floor without needing a single limited 5-star support.
It reliably clears MoC, just more slowly, since you lose the energy and buff density that Sparkle or Sunday bring to the premium version.
Seele HSR Ascension and Trace Materials

Ascension materials (Lv1 to 80, full total):
| Material | Total |
|---|---|
| Thief’s Instinct | 15 |
| Usurper’s Scheme | 15 |
| Conqueror’s Will | 15 |
| Void Cast Iron | 65 |
| Credits | 308,000 |
Trace materials (all skills maxed, full total):
| Material | Total |
|---|---|
| Arrow of the Beast Hunter | 15 |
| Thief’s Instinct | 41 |
| Arrow of the Demon Slayer | 72 |
| Usurper’s Scheme | 56 |
| Arrow of the Starchaser | 139 |
| Conqueror’s Will | 58 |
| Guardian’s Lament | 12 |
| Tracks of Destiny | 8 |
| Credits | 3,000,000 |
Trace priority runs Skill first, then Ultimate and Talent roughly tied, then Basic ATK last, since the free auto-cast makes Skill scaling worth more than usual.
For major traces, Lacerate (A4) comes before Rippling Waves (A6), which comes before Nightshade (A2), though all three are worth maxing eventually.
Farm Arrows from Calyx daily, hit the weekly boss for Guardian’s Lament, and don’t skip Simulated Universe mob drops for Thief’s Instinct and Usurper’s Scheme, since those add up faster than people expect.
See Also: Honkai Star Rail Nameless Wispae Locations Guide: All Planarcadia Spots & Rewards
Seele’s best build in Honkai Star Rail post-4.2 comes down to the same core formula it always has: stack CRIT Rate and CRIT DMG hard, run Genius of Brilliant Stars with Rutilant Arena, and build around chaining kills into Resurgence as often as the fight allows.
The buffs didn’t reinvent her, they removed the friction that made her feel clunky actually to pilot, and that’s a bigger deal than any single number change.
If you’re sitting on an E0S0 Seele wondering whether the jump to E0S1 is worth it, treat it as a straightforward vertical investment call.
A Hunt unit needs her own signature stat stick to stay relevant once boss kits start leaning AoE, and In the Night is built specifically around the SPD loop her kit already runs on.
Stacking Stellar Jades ahead of her rerun is the smarter path than gambling cold on pulls, and the fastest, safest way to build that stash without overpaying is to buy Oneiric Shards or stack the Express Supply Pass through Joytify.
Get the weapon, lock the build, and let the Resurgence counter do the rest.
Why buy shards from a random site when you can Star Rail top up at Joytify? Trusted platform with complete payment options for US gamers.
TL;DR
- Seele's optimal build focuses on maximizing CRIT Rate and CRIT DMG to ensure her ultimate attack consistently hits, especially after the Novaflare buffs in Version 4.2.
- Seele's Resurgence mechanic now provides three turns of bonus damage after a kill, enabling more reliable damage output and making her rotations less fragile.
- Team compositions for Seele should focus on hypercarry setups that optimize her SP usage and maximize her damage potential, with recommended characters like Sparkle and sustain units.